Saturday, November 30, 2013
There's Nothing to Fear from Bar Soap
Many folks believe that liquid soap is best for cleaning the hands and body because bar soap is somehow unsanitary.
I've even read that bacteria can grow on soap bars, and that people
shouldn't share bars because it can spread disease.
 So I
went looking for some evidence that bar soap is this vector of
contagion. I found several studies that show that bar soap, especially
when left to sit in a puddle of water or in a wet soap dish can harbor
colonies of bacteria. It makes sense since bacteria love to hang out in
wet places.
So I
went looking for some evidence that bar soap is this vector of
contagion. I found several studies that show that bar soap, especially
when left to sit in a puddle of water or in a wet soap dish can harbor
colonies of bacteria. It makes sense since bacteria love to hang out in
wet places.Friday, November 29, 2013
DIY Techniques for Making Unique Cold-Process Soaps

Soap Crafting: Step-by-Step Techniques for Making 31 Unique Cold-Process Soaps
The Soap Queen, Anne-Marie Faiola, shows you how to make perfect cold-process soap that is better than what you can buy at the store! Simple instructions and great photography walk you through every step of 31 exciting recipes, making it easy to master the techniques you need and produce the soaps you want.You'll find chapters on colors (neon, oxides, mica), molds (milk jugs, yogurt containers, pipes), food (pumpkin, coffee, beer, avocado, oatmeal), and building (embedding soap in soap, funnel pour, swirling). Faiola offers everything you need to make your own soap, safely and enjoyably.
"Whether you are curious about making your own soap, or are looking for some soapy inspiration, Soap Crafting is so full of great ideas and gorgeous photos you won’t be able to resist the urge to pick up a stick blender! Anne-Marie Faiola has condensed her many years of soapmaking experience into this new book that covers
everything from the basics to the beautifully complex (like a 12-color swirl! Wow!). You can’t go wrong with the clear instructions and plenty of inspiring photos. If you love soapmaking, you’ll love this book. If you don’t love soapmaking, get this book and you soon will!" — Ruth Esteves, co-owner of The Nova Studio and Sirona Springs Handmade Soap, and author of Coloring Soap Naturally.
Full book details here:Soap Crafting: Step-by-Step Techniques for Making 31 Unique Cold-Process Soaps
.
DIY Making your own detailed soap molds

Silicone Plastique® has become a valuable tool in the creation of custom food moulds around the world. Mould making has always been considered a complicated task, yet with this silicone mould putty a new world of easy mould making has been made possible.
Once mixed, Silicone Plastique® will stay workable for about 15 minutes giving ample time to make an accurate and well made mould of almost any object. Cure time is only about an hour at room temperature to create a pliable yet durable rubber mould suitable for direct food contact. This amazing mould putty can be put in the freezer without losing flexibility and resists temperatures as high as 230°C.
(Durometer) Shore Strength: 35
Re-Moulding Silicone Plastique - Once Silicone Plastique has cured, it is a commercial grade silicone rubber that cannot be melted or dissolved in order to make another mould. Remouldable materials are usually made of gelatin and have many drawbacks like:
- The gelatine dries out and the mould shrinks and cracks.
- Gelatine moud making materials cannot be used for hot applications like cooked sugar and Isomalt.
- Gelatine moulds perform very poorly when placed in a freezer or frozen.

Almost half of mould making customers purchase Silicone Plastique®™
for use with non-food materials. Reasons given are ease of use, high
quality from a platinum based curing system and the peace of mind that
comes from using a product that is not harmful or toxic.
Silicone Plastique® is Outstanding to Make Moulds For: Soap, Chocolate, Butter, Fondant, Ice Cream, Pulled Sugar, Cheese, Ice, Gelatine, Hard Candy, Gum Paste, Pastillage, Royal Icing, Candy Clay, Butter Cream, Marzipan, Sherbet, Sorbet.
Silicone Plastique will work with any material in the gypsum category. Examples of these materials are:
Plaster, Cement, Concrete, terra cotta, clays of all types.
Silicone Plastique will also work with any of the following materials:
Casting Resins of all types, Epoxy Resins of all types, Fiberglass Resin, Hot Glue, Air Dry Clay, Polymer Clay (sculpey, fimo, cernit), paper mache, low melt metals,
Materials Silicone Plastique does not mould well are: Spent Uranium Cryptonite Mana From Heaven & Molten Lava.
Step 1

Silicone Plastique® has the consistency of clay. Equal amounts of Part A (blue) and Part B (white) are scaled by weight or volume.
Step 2

Parts A and B are combined and kneaded until a uniform colour is achieved. Silicone Plastique® can be flattened by hand or rolled with a pin between sheets of plastic.
Step 3

A small amount of plastique is rubbed into detail of a medallion. The medallion is pressed into Silicone Plastique® that has been rolled out twice the thickness of the medallion.
Step 4

Silicone Plastique® has a work time of about 10 minutes and a cure time of about an hour at room temperature. Silicone Plastique® should be allowed to fully cure before removing medallion.
Step 5

Chocolate is poured into cured mould.
Step 6

With a flex of the mould, a perfect chocolate copy of the medallion pops out of the mould, ready to garnish your favorite dessert.
Easymold silicone putty is ideal for a wide range of impression type mold applications. Keep this stuff in mind for things like smaller guest sized soaps, although, I really suggest pouring silicone rubber for big bars of soap.
Easy to use, 3-minute working time, 25-minute cure
Ideal for small molds, excellent detail from original
Strong, flexible, reusable molds
High Heat range, up to 400-Degree F
Self releasing, no mold release agent required for most applications
See it here:
Environmental Technology 1-Pound Kit Casting' Craft Easymold Silicone Putty
Instructions originally posted and available in England: http://www.thecakedecoratingcompany.co.uk/catalog/product_info.php?products_id=3905
.
http://www.pinterest.com/pin/create/button/#widget
Thursday, November 28, 2013
Jessiepearl's Christmas Gift Selection
4 Bars Handmade Natural Soap BY JESSIEPEARL'S HANDMADE SOAPS
 For jessiepearl's Christmas Gift Selection, choose from any soap described in this Etsy store.
OATMEAL SPICE
LAVENDER .
LEMONGRASS TEA
THYME GARDEN .
PINK GRAPEFRUIT .
PATCHOULI .
PEPPERMINT LEAF .
BLOOD ORANGE BERGAMOT
MONTANA PRAIRIE .
CITRUS LAVENDER .
FOREST TONIC .
SENSITIVE SKIN / UNSCENTED
GARDENER'S HAND SOAP .
SHEA HONEY OATMEAL
(soap only - decoration not included )
````````````````
We offer Handmade Soaps made in small batches using high quality Essential Oils, Herbs and other natural soap making ingredients.
Our soap bars are not meant to be cute and displayed on a shelf - they are meant to be used to moisturize your body, make you smell good.and most importantly to clean your skin.
Our over sized bars are carefully handmade in small batches so they may vary slightly, Each is approximately 3 3/4"x 2 "x 1" and weigh approximately 4.5 oz each. That's a big enough bar to cut in half to share or to prolong it's useful life.
https://www.etsy.com/listing/165255130/christmas-gift-selection-4-bars-handmade?ref=shop_home_active

..
..
Monday, November 25, 2013
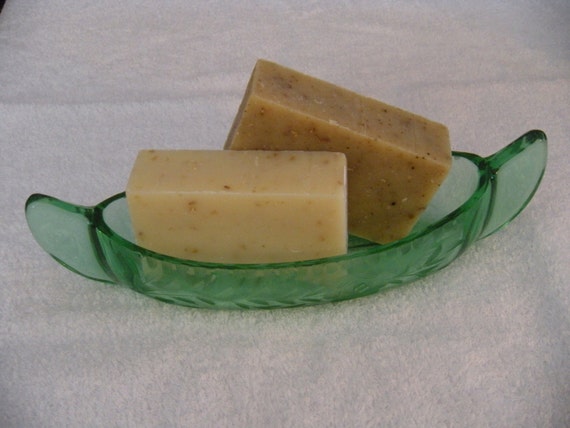
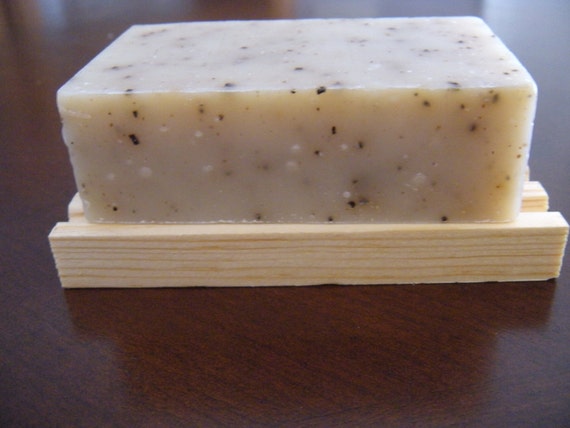
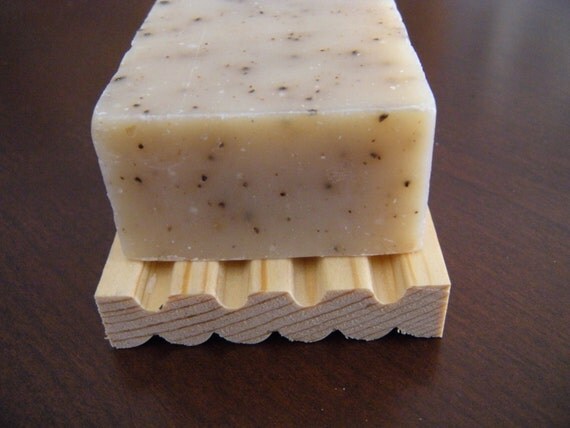
Handmade Fluted Wooden Soap Tray
This offer is for a Handmade Fluted Wooden Soap Tray - Wood
Dish for proper drainage for all soaps - single or wholesale BY
JESSIEPEARL'S HANDMADE SOAPS
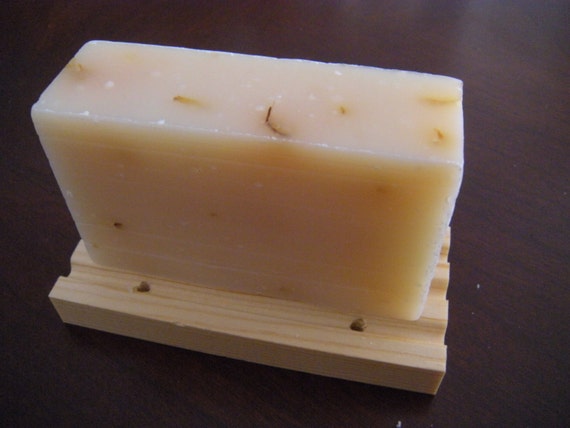

Our soap holders measure 37/8" by 4" by 3/4", a perfect size to hold just about any soap.
These soap dishes are not stained, they are in their natural state. We also offer them finished with vegetable oil when requested.
These trays are also useful for drying sponges at the kitchen sink or airing out steel wool.
These soap trays are a great green, eco-firendly gift!s
SPECIAL: When you BUY 5 BARS OF SOAP YOU RECEIVE A SOAP TRAY FOR FREE!
Soap makers - Ask us for wholesale prices
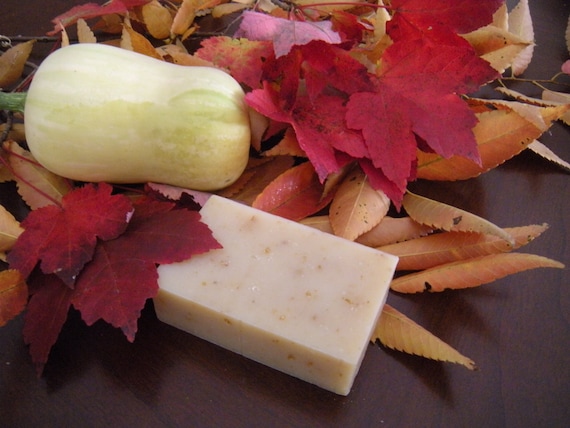
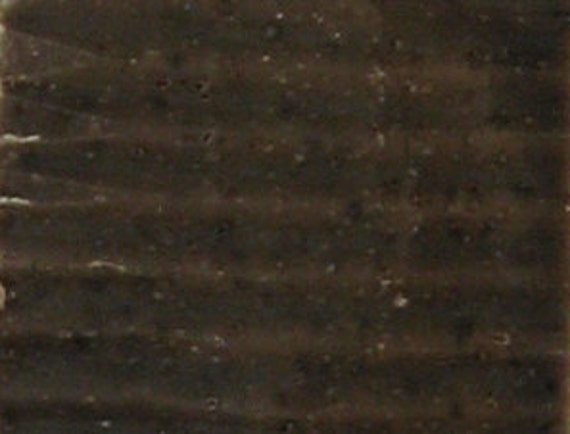
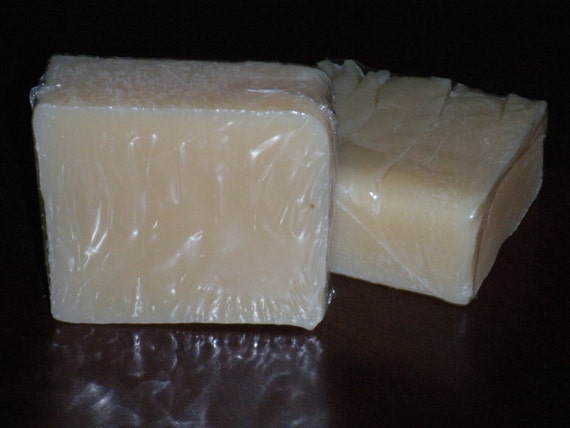
Coffee Kitchen Soap
" Coffee Kitchen Soap" SOAP BY JESSIEPEARL'S HANDMADE SOAPS.
Coffee Kitchen Soap has a heavy dose of Dark Coffee Grounds and Powdered Cocoa that acts as a deodorizer and exfoliate in soap.
Used in the kitchen, it removes the smell of garlic and onion from the hands. Great for chefs and those who look to cook.
Plus the exfoliation will get your fingers sparkling clean. A very pretty soap with an awesome scent!
INGREDIENTS
saponified oils of soybean, olive, coconut & shea butter.
Essential oils: none
Botanicals: freshly ground coffee beans, powdered cocoa.
Color: a hint of brown and black oxides
..
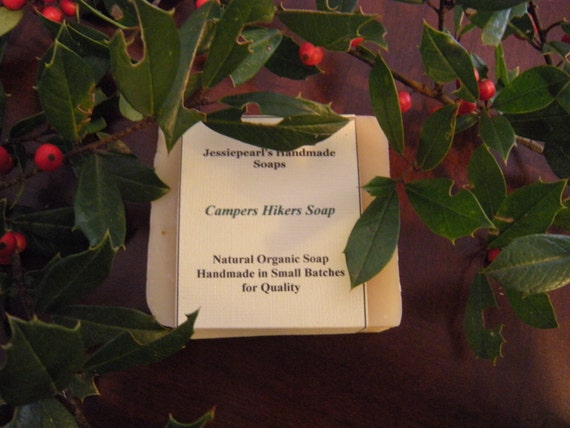
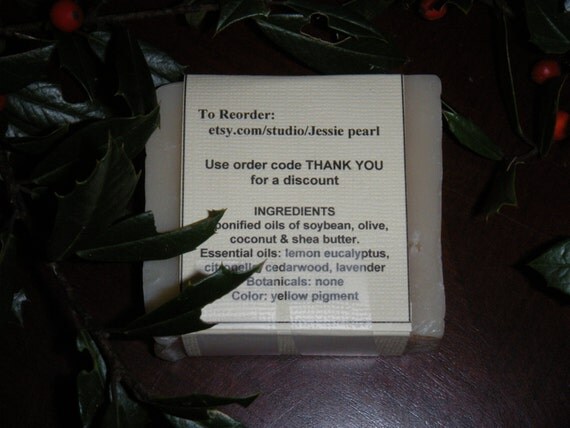
Camping and Hiking soap - repel bugs and mosquitoes
A soap bar that repel bugs and mosquitoes - Great for travel, hiking,
camping and outdoor adventures - Soap that gets the dirt out
 You
receive one bar of our mosquito repellant soap that you can cut in half
because while traveling you want your favorite soap with you but do not
want having a full sized wet soap bar to carry.
You
receive one bar of our mosquito repellant soap that you can cut in half
because while traveling you want your favorite soap with you but do not
want having a full sized wet soap bar to carry. When you go camping or hiking you also want to take a soap that you are confident is biodegradable, and has no polluting chemicals, No worries about upsetting Mother Nature!
Why Camping Mosquito Soap?
1)Recently the CDC came out with a press release stating the lemon eucalyptus oil was a good, natural alternative to Deet,
2)All the essential oils in this soap are present because they have a tendency to repel different types of bugs.
3)Anyone who grows lavender knows that you never need to use pesticides on it because bugs naturally stay away from it.
4)Citronella has always been known to keep nasty little bugs away.
5)The Cedarwood oil in the soap, reminds us of how pet bedding is usually filled with cedar chips in order to deter fleas.
Camping Mosquito Soap Ingredients:
saponified oils of soybean, olive, coconut & shea butter.
Essential oils: lemon eucalyptus, citronella, cedarwood, lavender
4+ oz .
..
Saturday, November 23, 2013
Honey Bunches Of Oats Combo Special
Honey Bunches Of Oats Combo Special - 1 Bar Each of "Shea Honey Oatmeal" and "Oatmeal Spice" Handmade Natural Soaps
 Shea
butter and honey to moisturize plus oatmeal to exfoliate with no added
scents makes this a premium skin care bar for all skin types.
Shea
butter and honey to moisturize plus oatmeal to exfoliate with no added
scents makes this a premium skin care bar for all skin types.
The traditional use of the butter is to reduce the appearance of fine lines, scars and stretch marks, and to ease a variety of skin irritations, such as psoriasis, eczema and sunburn. Makers of cosmetics also mix this natural substance with other botanical ingredients. Shea butter is ideal for the topical application of cosmetic and medicinal formulas, because it melts on contact and is readily absorbed into the skin, without leaving a greasy residue.
Oatmeal provides skin-healing gentle exfoliation and cloves give this soap a beautiful spicy scent. What a wonderful combination for your enjoyment.
All of our bars lather extremely well. Our Oatmeal Spice bars have great deodorant qualities
OATMEAL SPICE INGREDIENTS- Saponified oils of safflower* and/or sunflower*, palm*, and coconut* (with retained glycerin); oats*; essential oils of clove bud and cassia; cloves*; rosemary extract. (ingredients marked with an asterisk are certified organic) Note that natural ingredients (both herbs and essential oils) may vary in color from these pictures.
SHEA HONEY OATMEAL INGREDIENTS - Saponified oils of safflower* and/or sunflower*, palm*, and coconut* (with retained glycerin); oats*; shea butter*; honey; rosemary extract. (ingredients marked with an asterisk are certified organic)
If you have a known allergy to other tree nuts, you may experience a reaction to Shea butter. Consult your physician or allergist before using this product, if this is the case.
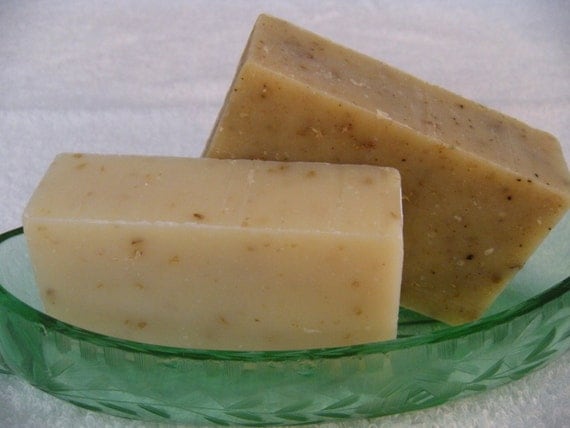
Gardener's Hand Soap
"Gardener's Hand Soap" SOAP BY JESSIEPEARL'S HANDMADE SOAPS.
Play in the dirt without fear. Gardener's Hand Soap is full of exfoliates - ground apricot kernels and coffee - The result is the dirtiest hands are now clean leaving a fresh lemon scent.
Gardener's Hand Soap Ingredients: Saponified oils of safflower* and/or sunflower*, palm*, and coconut* (with retained glycerin); essential oils of lemon, lavandin, orange, and patchouli; apricot kernel; ground coffee*; jojoba oil*; rosemary extract. (ingredients marked with an asterisk are certified organic)
Shown in one of the pictures with our handmade fluted wooden soap trap that provides proper drainage for all soaps. Sold separately
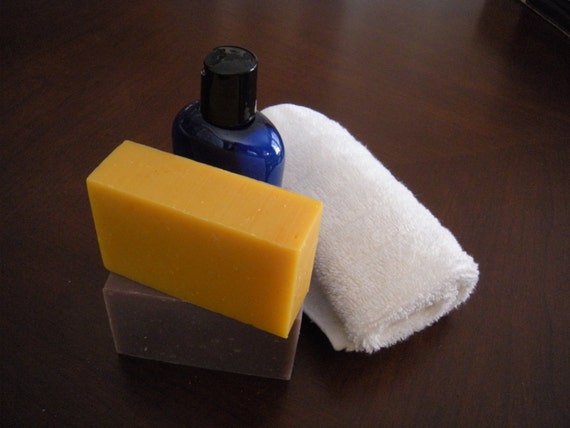
Lavender Collection Special
Lavender Collection Special - Lavender Soap Bar, Citrus Lavender Bar and Lavender Massage Oil
A terrific collection of great Lavender Scents - One 4+ oz bar each of Citrus Lavender Soap and Lavender Soap plus a 4 oz bottle of lavender Massage Oil.
The most common purpose for lavender today is aromatherapy. Well known as a sleep-promoting herb, its oil is useful for promoting pleasant dreams and a good-night's rest.
Aside from its calming effect, lavender is also a very uplifting and soothing herb, which is why many aromatherapists also recommend using lavender to prevent depression and combat stress, anxiety, and fatigue. For this purpose, a wide array of lavender scented products ranging from perfumes to soaps and teas have been made to cater to the demands for this truly remarkable herb.
Combine all of this with cleansing power and you have a favorite soap for your daily use or as a welcomed gift for friends and loved ones.
https://www.etsy.com/listing/166379256/lavender-collection-special-lavender?ref=shop_home_active
,,
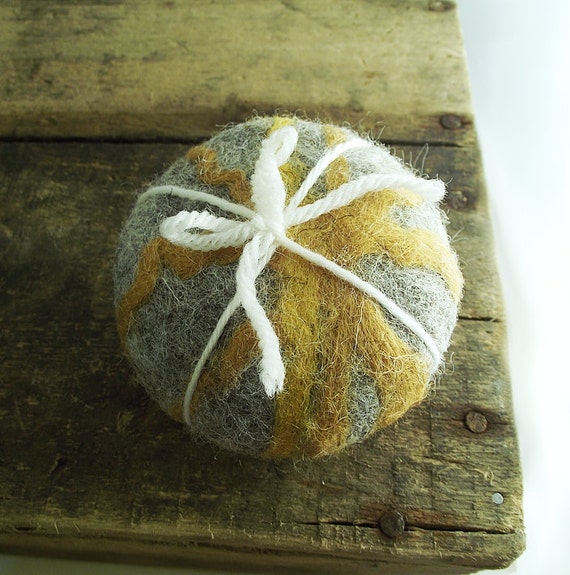
DIY Felted Soap How To
Felted Soap
This is an activity that is easy to do with young kids, though they
might get a tiny bit wet! These would be cute gifts to make for
grandparents.

To get started you need:
-A bar of soap
-1-2 ounces of wool-a soft fiber such as merino
(avoid superwash which won't wet felt)
-A ziploc bag
-Dish soap, or another bar of soap
-A towel
-vegetable peeler

If your soap is rectangular, first take a vegetable peeler and to round the edges a bit. This will make it easier to cover the soap bar completely without any corners peeking out.

Now you can begin wrapping the bar of soap with wool. I usually start with a base layer of plain white fiber, though any color is fine. Pull off pieces of wool roving that are about one inch thick and two feet long to make this easier. Try to wrap tightly without twisting the fibers to help keep the surface as smooth as possible.

Once you have wrapped the soap going in one direction (vertically), flip it to the side and wrap it in the opposite direction (horizontally).

Now wrap it vertically again, make sure to cover the narrow sides too. This makes for three layers so far and should be good enough for the base layer.

The fun part is adding your design layer. Layer on any colors you want and any direction-just try to keep the layers as smooth as possible.

Here you can see just how much bigger the wrapped soap looks before it is felted. It will have shrunk quite a bit when you are done.

Carefully place the wrapped soap inside a ziploc bag. Add some dish soap to a few cups of warm water and pour some water into the bag to fully wet the wool. Let the excess water run out and seal the bag closed. With the bag on the counter, gently rub your hand back and forth over the surface, turning to get all sides of the wrapped soap. Then gently toss the bag bag and for between your two hands, left to right, right to left for about 20 tosses.

To get started you need:
-A bar of soap
-1-2 ounces of wool-a soft fiber such as merino
(avoid superwash which won't wet felt)
-A ziploc bag
-Dish soap, or another bar of soap
-A towel
-vegetable peeler

If your soap is rectangular, first take a vegetable peeler and to round the edges a bit. This will make it easier to cover the soap bar completely without any corners peeking out.

Now you can begin wrapping the bar of soap with wool. I usually start with a base layer of plain white fiber, though any color is fine. Pull off pieces of wool roving that are about one inch thick and two feet long to make this easier. Try to wrap tightly without twisting the fibers to help keep the surface as smooth as possible.

Once you have wrapped the soap going in one direction (vertically), flip it to the side and wrap it in the opposite direction (horizontally).

Now wrap it vertically again, make sure to cover the narrow sides too. This makes for three layers so far and should be good enough for the base layer.

The fun part is adding your design layer. Layer on any colors you want and any direction-just try to keep the layers as smooth as possible.
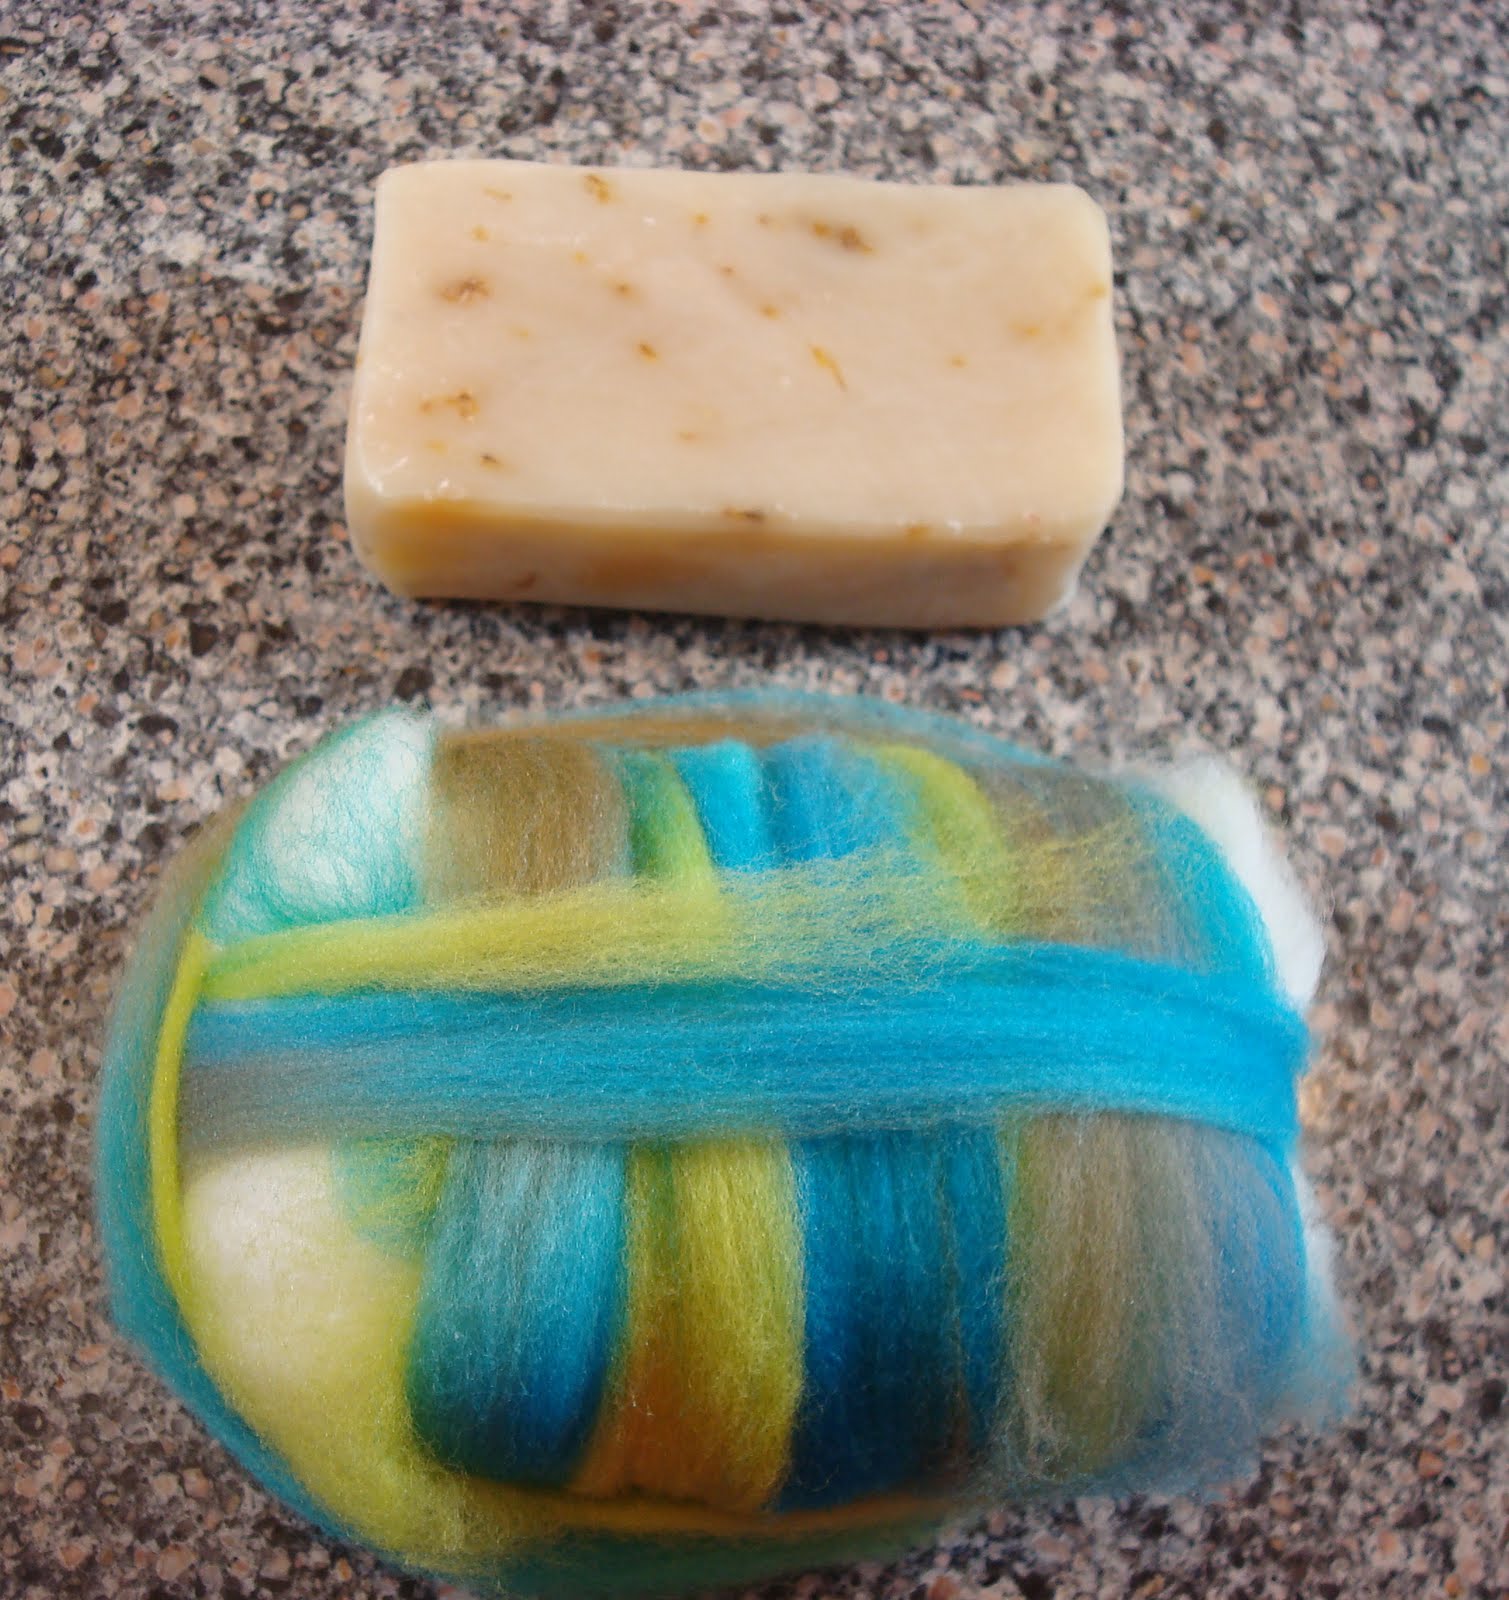
Here you can see just how much bigger the wrapped soap looks before it is felted. It will have shrunk quite a bit when you are done.

Carefully place the wrapped soap inside a ziploc bag. Add some dish soap to a few cups of warm water and pour some water into the bag to fully wet the wool. Let the excess water run out and seal the bag closed. With the bag on the counter, gently rub your hand back and forth over the surface, turning to get all sides of the wrapped soap. Then gently toss the bag bag and for between your two hands, left to right, right to left for about 20 tosses.

Open the bag, and add more hot soapy water, let the extra drain and seal it again. Now begin to roll the bagged soap in your hands, like you do with a regular bar of soap when washing your hands.
Change directions frequently, roll the soap lengthwise. Do this for a few minutes. The wool should be starting to shrink now.

Remove the soap from the bag and do the pinch test. Does the top layer of fibers lift up, or does it seem attached to the base as one layer? If the fibers lift up you need to work a little bit more. You can put the soap back in the bag with more hot soapy water, or you can suds up your hands and roll it around in all directions. Surface friction is the goal. For wool to wet felt it needs friction, and hot soapy water.

When the felt passes the pinch test, rinse it as best as you can with cold water, You will never get all of the soap out, as by this point the bar of soap will have started to suds up inside the wool. Roll the felted soap inside a towel to get as much water out as possible and dry on a rack.

If you want to make something fancier you can try needle felting a design on some layers of loose wool. Lay this design over the base layer of the soap, wrapping the edges of the wool to the back before felting.
Originally Posted on: http://www.freewebs.com/dragonflyducky/feltedsoap.htm
To use : Wet bar and lather up to use during bath. When not in use store bar on a wire soap rack.
When the soap dissolves, reuse the woolly coat by making a small slit and slipping your own bar inside.
 After every use, make sure to place the soap somewhere where the felt
can dry completely. Apparently, as you use up the soap inside, the wool
continues to felt and shrink, so that you can use every last ounce of
that bar soap without getting soap slime on your hands! When the soap
is all gone, you can cut open the felted pouch and use it for any number
of things-fill it with potpourri, sew it back up and use it as a
scented sachet bag for your drawers. Make it
into a little drawstring bag for your kids’ treasures-the possibilities
are endless! Or, as mentioned above, you can put a new bar of soap in it.
After every use, make sure to place the soap somewhere where the felt
can dry completely. Apparently, as you use up the soap inside, the wool
continues to felt and shrink, so that you can use every last ounce of
that bar soap without getting soap slime on your hands! When the soap
is all gone, you can cut open the felted pouch and use it for any number
of things-fill it with potpourri, sew it back up and use it as a
scented sachet bag for your drawers. Make it
into a little drawstring bag for your kids’ treasures-the possibilities
are endless! Or, as mentioned above, you can put a new bar of soap in it...
DIY Aromatherapy Recipes for Anxiety

These recipes may help during times of anxiety.
When selecting and using essential oils,
be sure to follow all safety
precautions and remember that aromatherapy should not
be used as a substitute for proper medical treatment.
|
Blend #1
Blend #2
Blend #3
Blend #4
|
Directions: Select one of the blends shown above.
Then, choose which method you'd like to use the blend and follow the directions
below:
Diffuser Blend:
Multiply your blend by 4 to obtain a total of 20 drops of your chosen blend. Add your oils to a dark colored glass bottle and mix well by rollling the bottle in between your hands. Add the appropriate number of drops from your created blend to your diffuser by following the manufacturer�s instructions.Bath Oil:
Multiply your blend by 3 to obtain a total of 15 drops of your chosen blend. Continue by using the 15 drop blend in the Bath Oil recipe.Bath Salts:
Multiply your blend by 4 to obtain a total of 20 drops of your chosen blend. Continue by using the 20 drop blend in the Bath Salts recipe.Massage Oil:
Multiply your blend by 2 to obtain a total of 10 drops of your chosen blend. Continue by using the 10 drop blend in the Massage Oil recipe.Air Freshener:
Multiply your blend by 6 to obtain a total of 30 drops of your chosen blend. Continue by using the 30 drop blend in the Air Freshener recipe.
Visit the Aromatherapy
for Emotional Well-Being article for a list of oils that help with
this condition and for information on using aromatherapy to enhance your
emotions.
Originally Posted by http://www.aromaweb.com/recipes/anxiety.asp
..
DIY Essential Oil Use Chart For Aromatherapy
Essential Oil Use Chart: A Quick Reference for Choosing and Using Appropriate Essential Oils
The true therapeutic essential oils are truly a natural solution to be used by anyone to treat common ailments or health problems.
The essential oil use chart below is a summary of what can be done with essential oils and how they can be used.
| Common Ailments | Essential Oils to Use | Method of Application |
|---|---|---|
| Aches and Pains | basil, benzoin, black pepper, chamomile, cinamon, clove, cypress, ginger, juniper, lavender, marjoram, rosemary, thyme, ylang ylang | massage, compress, bath |
| Acne | basil, bergamot, cedarwood, cypress, geranium, grapefruit, lavender,palmarosa, rose, tea tree | bath, massage |
| Asthma | chamomile, frankincense, myrtle, myrrh, pine | bath, massage, vaporization, inhalation |
| Athlete's foot | lavender, lemon, myrrh, tea tree | bath, neat application |
| Chest Problems | benzoin, frankincense, myrtle, myrrh, niaouli, pine, rosemary, tea tree, thyme | bath, massage, vaporization, inhalation |
| Chilblains | benzoin, black pepper, cedarwood, ginger, juniper, marjoram, thyme | massage, bath, compress |
| Colds and Flu | basil, benzoin, black pepper, cinnamon, eucalyptus, ginger, lavender, lemon, myrtle, niaouli, peppermint, pine, tea tree, thyme | bath, massage, vaporization, inhalation |
| Constipation | black pepper, clary sage, cypress, eucalyptus, peppermint, rosemary | massage, bath, compress |
| Cramp | chamomile, lavender, marjoram, sandalwood, vetiver | massage, bath, compress |
| Cystitis | chamomile, lavender, tea tree, geranium, pine, sandalwood | massage, bath, compress |
| Dandruff | cedarwood, lavender, lemongrass, sandalwood | scalp message, rinse |
| Diarrhea | chamomile, lavender, rose, neroli | massage, bath, compress |
| Eczema | benzoin, chamomile, lavender, myrrh, sandalwood, vetiver | massage, bath |
| Fluid Retention | black pepper, cypress, juniper | massage, bath |
| Hay Fever | bergamot, cedarwood, chamomile, eucalyptus, geranium, lavender, lemongrass, myrtle, pine, rose, rosemary, rosewood, ylang ylang | bath, massage, vaporization, inhalation |
| Headaches | chamomile, lavender, lemongrass, peppermint, rosewood | bath, massage, vaporization, inhalation |
| Headlice | bergamot, eucalyptus, geranium, lavender, lemon, tea tree | scalp massage, rinse |
| Herpes | Chamomile, lavender, myrrh, tea tree | bath, massage, compress, neat application |
| High Blood Pressure | bergamot, chamomile, fennel, frankincense, lavender, mandarin, marjoram, neroli, rose, sandalwood, vetiver, ylang ylang | massage, bath, vaporization, inhalation |
| Indigestion | dill, fennel, parsley, peppermint, mandarin | massage, inhalation |
| Nausea | bergamot, black pepper, chamomile, fennel, ginger, grapefruit, lavender, mandarin, orange, peppermint, rosewood | bath, inhalation, vaporization |
| Sinusitis | chamomile, lavender, eucalyptus, lemon, lemongrass, myrtle, niaouli, peppermint, pine, tea tree | massage, bath, vaporization, inhalation |
| Sprains | chamomile, lavender | massage, bath, compress |
| Throat Infections | basil, benzoin, black pepper, cinnamon, eucalyptus, lavender, lemon, myrtle, niaouli, peppermint, pine, sandalwood, tea tree | massage, bath, compress, inhalation, vaporization |
How to use this essential oil use chart?
I like an essential oil use chart that is listed by ailment in alphabetical order because illness is most people will think about when using essential oils.Basically, you look up your ailment on the left side, whether it is a headache or cold or other problems. Then see what essential oils to use to treat the problems. On the right side, the chart would suggest variety ways on how to use the essential oils, such as bath, massage or inhalation.
Bath - For beginner, you can add up to 6 drops in a bathwater and If you have sensitive skin don't add more than 6 drops. You can gradually increase the dose up to 10 drops if you have become familiar with its effects.
Tips:
- Always add the oils after the water has been run and ensure the water is not too hot or the oils will vaporize.
- Essential oils do not dissolve in the water, but float in the surfaces, so make sure you don't sit on them directly
Compress - Compress can be done with a cold or hot water. For a cold compress, add 2 or 3 drops essential oils to ice water then soak a cloth and wring it out. Lay it on the affected area for about 15 minutes. Do the same to make hot compress. Hot compress will cool quickly and must be replace frequently.
Inhalation - Add about 10 drops to hot water then lean over the bowl and cover your head with towel for 10 minute as you inhale.
Vaporization - The best way to use vaporization is to use ceramic aromatherapy oil burner. Add 4 drops to water in a bowl. Other option is to use electric oil diffuser
Neat Application - only to be used by lavender and tea tree essential oils. Others I might not suggested. But
Author Glenda Taylor in Essence of Aromatherapy says, lemon oil can be applied neat on warts and veruccas only. Ylang ylang, rose, jasmine, neroli and sandalwood can be used neat in small quantities as a perfume.
For you convenience, you can print this essential oil use chart and hang it on the wall or make a bookmark.
Other than this essential oil use chart, you can buy Aromatherapy chart which has many options for your needs

Essential oil use chart
DIY Aromatherapy For The Holidays

Originlly Posted on http://www.theyummylife.com/Natural_Room_Scents
Don't miss my follow-up post to this one with
NATURAL ROOM SCENTS FOR DIY GIFTS & CENTERPIECES
CLICK HERE
NATURAL ROOM SCENTS FOR DIY GIFTS & CENTERPIECES
CLICK HERE
This post was featured in the April 2013 issue of Woman's Day magazine.

Here's the thing. I'm married to a man who hates artificial scents of any kind. That goes for air fresheners, candles, perfume, soaps and anything else that is scented. We buy unscented everything. I could probably buy a car with the money I've saved on perfume throughout the years of our marriage.
Turns out that King-Man may just be ahead of his time. I've recently been reading about air fresheners and their harmful ingredients. Many of them are especially hard on people with allergies and asthma. One more thing to stay away from.
But, the air in my house gets stale sometimes. Or, the day after I've cooked with garlic, that aroma that was so appealing when I was cooking becomes very unpleasant. I want to walk into my house and have it smell pleasant. Nothing overpowering or even that noticeable. Just pleasant.
There is a simple, all natural, truly lovely solution. That is to fill the air in my home with subtle scents of spices, herbs, and fruit. All I have to do is simmer some sweet smelling ingredients in water. The steam fills the air with a pleasant scent. Truth is, I did this many years ago on the advice of our realtor when we were selling our house. Realtors often advise sellers to bake cookies or boil cinnamon water right before a potential buyer drops by. That inviting aroma goes a long way to leave a good first impression. Why I didn't continue scenting the air in a similar way for our own enjoyment, I don't know. I've now got a simple routine going that keeps our house smelling pleasant without staleness or day-after garlic odor.
Keeping the supply list simple. I only used items available at the grocery store or in my yard for these scent recipes. I want this to be easy and inexpensive so that I can set up a sustainable routine of pleasantly scenting our home. These recipes are simply guidelines and don't have to be followed exactly. In fact, I change them up all the time based on what I have on hand in my kitchen or yard.
How to Make Natural Room Scents
Fragrant items for naturally scenting your home:
- citrus -- I've tried other fruits. Some of them smell good initially, but they don't hold up for more than one use. Citrus is sturdier, longer-lasting, and gives these scent recipes freshness. Lemons and oranges are particularly fragrant and have the best staying power in these scented waters.
- herbs -- Any herb can be used for making a room scent, but the ones that are sturdier and on woody twigs hold up the best. My favorites for room scents are rosemary and thyme.
- pine or cedar twigs/needles -- There may be other fragrant trees that will work, too; pine and cedar are the two I've tried for their appealing, fresh fragrance.
- extracts -- A touch of vanilla or almond extract improves most room fragrance mixtures. Mint extract has a nice fresh scent. You can also use whole vanilla beans instead of vanilla extract; pricey but amazingly fragrant. Amazon has a good bulk price (80% less than grocery store prices).
- spices -- You can use ground or whole sweet spices. The whole spices look prettier, if your scented water will be in a location where it will be seen. I have found that cinnamon sticks and whole cloves have the most scent staying power. Cinnamon sticks can be rinsed off and reused several times. They keep on giving.

Five Natural Room Scent Recipes
These are all scents that my nose likes. But, scents that are pleasing to one person may not be to someone else. Consider how many different scents of perfumes, soap, and candles there are in stores in an effort to appeal to the masses. So, use my recipe combos as guidelines that you can tweak and customize to suit what your nose likes.
General procedure: Combine the ingredients in a 2 cup (pint) jar or container, or in a pan on the stove top. Cover them with water and heat. I'll explain different heating options further down. Keep reading.
Scent #1: Oranges, cinnamon & cloves (allspice and anise are optional). This is my favorite, both for it's wonderful aroma and for it's staying power. This scent carries into multiple rooms better, and it can be reheated to scent your rooms for several days.

Scent #2: Lemon, rosemary, & vanilla. A similar scented water is often simmering in Williams-Sonoma stores. It has a lovely freshness to it.

Scent #3: Lime, thyme, mint & vanilla extract. This combination has such a fresh, pleasant scent. I initially made it without the mint extract, but have found that it really kicks up the aroma.

Scent #4: Orange, ginger (fresh or powdered), and almond extract. This is a sweet, delicious scent.

Scent # 5: Pine or cedar twigs (or other fragrant twigs), bay leaves, and nutmeg. These scents combine for a complex aroma. If you have whole nutmeg, use a microplane to grate off the outer surface--this will release the scent. Add the whole nutmeg piece along with the gratings.

Here's the gang of five. Aren't they beautiful? I like to make these up in pint jars and keep them on hand in the fridge so I'm ready to start a pot of simmering scents as needed.

Make ahead and...
- ...store in the fridge. Uncooked jars of scented waters will keep in the fridge for 1 to 2 weeks, so you can make these ahead to have on hand. I recommend adding all of the ingredients, including the water, to the jars before refrigerating them. I've tried refrigerating the fruit/spice/herb combos in jars without the water, but they don't last as long that way.
- ...freeze them. I've tried freezing them both with and without the water added, and both ways work fine. I haven't tested them in the freezer longer than 2 weeks, but I'm confident that they can be frozen for a month or longer. Make sure you use freezer-safe jars like these pint wide-mouth mason jars. (Not all mason jars are freezer-safe.)
I've tried a variety of methods, and all of these work to varying degrees. Some of them provide a more powerful scent than others. Just like the air fresheners you buy, none of these will scent a whole house; but I'll show you some ways to set up individual scent sources in multiple rooms. Hopefully you already have what you need to try out one or more of these options.
Stove top method. This is by far the best way I've found to get the most powerful scent that will spread to more rooms the fastest. It's easy as can be. Simply combine the ingredients in a pot on the stove, bring them to a boil, and then lower the heat to a simmer. They will immediately begin to scent your kitchen and spread to other rooms. How far the scent spreads depends on the size and layout of your house. A simmering pot like this makes all four rooms on our first floor smell good. The only drawback of this method is that you have to keep a close eye on the water level. If the pan dries out, you'll be smelling burned citrus instead of sweet, fragrant citrus. NOTE: For a stronger scent, simply double or triple the recipe in a larger pot on the stove.

Uncovered Slow Cooker Method. This is my personal favorite. I use a mini slow cooker--the kind made for keeping dips and sauces warm. Mine only has one low heat setting. The mixture never actually bubbles and visibly steams. I leave it uncovered on my kitchen counter to slowly release scent throughout the day. It's subtle, but creates a pleasant smell in my kitchen and a hint of scent in surrounding rooms. When I'm home, I keep my mini slow cooker going. It's easy and uses very little electricity. When I fill mine in the morning, it won't dry out for an entire day. If you're concerned about accidentally letting it run dry, you can put a lamp timer on it so that it automatically shuts off at the desired time. I put a scented jar mixture in the microwave for 2 minutes to get it really hot before I add it to the slow cooker. That gives it a jump start on releasing the scent. NOTE: For a stronger scent, simply double or triple the recipe in a larger, full-size slow cooker and set it on high.
♦16 oz. mini slow cooker --holds a single batch--compact & economical--removable insert for easy cleaning; this is the size I use for regularly simmering scented water in my kitchen and is a great size for gift giving, too.
♦1-1/2 qt. small slow cooker --holds double or triple batch--removable insert for easy cleaning; the larger size doesn't have to be refilled as often.
♦on-off lamp timer --for auto shut-off

Fondue Pot Method. If you have a fondue pot, then you have a portable scent station. Set it up in any room you'd like to scent. Below is a small ceramic fondue pot I have that uses a tea light for heat. So, this will only remain warm as long as the candle lasts--3-1/2 to 4 hours. Like the slow cooker, this is a low level of heat and releases a very subtle scent--enough for a small room. Get the scent mixture boiling hot before adding it to the fondue pot. I like to set this up in our entry way when we have guests. It makes it smell wonderful when you walk through our front door. And, it looks pretty.

Mug Warmer Method. I normally keep this little mug warmer next to my computer to keep my coffee and tea warm. I've discovered it also can be used to keep a jar or small bowl of scent mixture warm. It only keeps it warm, it doesn't actually heat it up. So again, be sure to heat the mixture before adding it the bowl. Or microwave a jar and set it right on top of the mug warmer. This low heat puts off a soft, subtle scent that is suitable for a small area like a bathroom.
- Here's a hint to keep it pretty. As the mixtures cook and lose their color, they're not as attractive. You can spruce it up by floating a fresh slice of citrus on top. Or add a few cranberries (I keep a bag of them in my freezer); they float and add a touch of color.

Candle Warmer Method. These work just like the mug warmers. Candle warmers come with a little bowl on top for melting scented candle pellets. Instead, you can add some heated scented water. Or, remove the bowl and set a jar or other bowl on top.
- Note: I tested the temperatures of these with a thermometer. The mug warmer and candle warmer both kept the mixture at about 120°F. That's enough to let off a very subtle scent in a small area or room, but don't expect these to strongly scent a big room. You need more heat and steam for a stronger scent.

Tea Pot Warmer Method. My tea pot warmer also uses tea lights. I can put two or three tea lights in mine to achieve the temperature I want. These only last as long as the tea lights burn, but they can get hotter than the mug and candle warmers, thus releasing more scent. I can put a bowl or jar on top of my tea pot warmer, as long as I put it somewhere that I can keep an eye on it. I don't like to leave candles unattended.
view on Amazon: cast iron teapot warmer

Add more hot water as needed. As the water evaporates from any of these warming bowls or jars, top it off with additional HOT water. It needs to be hot when it's added so that it doesn't cool down the temperature of the scented water. Higher heat = more fragrance.
Gift them! These make a fun, unique hostess gift. Take one along to a party as a gift for your host that can be simmered and enjoyed the next day.
Reuse each mixture 2-3 times. After these have been heated and simmered for awhile, the water becomes cloudy (as you can see in the jars below), and some of the ingredients lose their vibrant color. Although they don't look as pretty, they still smell good. Usually, you can reheat and simmer these again 2-3 times. Jar them up and refrigerate them between uses. Open the jar and give it the sniff test--if it still smells good, reheat and reuse it. Add more water as needed.

Cost saving tips
You can save, use and reuse a number of fragrant ingredients. These scents don't need to be expensive.
- Leftover ginger -- If you ever cook with fresh ginger and end up with leftover pieces , this is a way to use them up before they spoil. Slice the leftover ginger and freeze it in a bag or container to have on hand for whipping up a quick batch of scented water.
- Save your orange peels -- When you eat an orange, save the peel for use in scented waters. Store them in the refrigerator or freezer until you need them.
- Save your juiced lemons and limes -- After you've juiced these for use in a recipe, refrigerate or freeze the leftover pieces.
- Save your leftover herbs -- If you have herbs in a garden or have leftover herbs that you've purchased for cooking, they can be frozen and saved for use in these scented waters.
- Use expired juices. If you have fruit juices that are past their prime, use them as a base in place of the water in these mixtures. They're both fragrant and colorful.
- Use expired spices. Spices are supposed to be replaced after a year, because they lose much of their flavor. But, they still smell good! Instead of throwing out old spices, use them for scenting water.

There are endless combinations for these scented waters
..
Subscribe to:
Posts (Atom)