Choosing a mold – A Soapmaking Tutorial
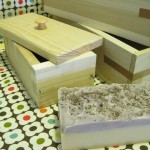
Wooden Loaf Molds – These molds must be
lined using freezer paper or other method of lining. In my experience,
soap usually gels* without added insulation. Soaping in colder climates
might require more insulation such as towels or blankets to help force
gel* completely. You’ll want to purchase a mold made of a hard wood such
as poplar that is untreated. Treated wood can react if exposed to
unsaponified soap as well as to heat in your oven if you choose to use
your mold in the oven for any reason (such as forcing gel*).
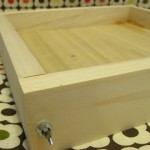
Wooden Slab Molds – Same as wooden loaf molds.
Individual Cavity Molds – same as Plastic or PVC Slab Molds. Individual cavity molds are especially good for salt bars as they don’t require cutting.
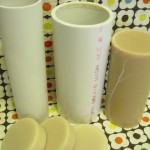
PVC Pipe – Great for making round soap. Molds don’t need to be lined but can be prepared with mineral oil to help soap release easier. After pouring in soap, cover with plastic wrap and a dish towel to insulate the top of mold. Leave soap in mold for 24-48 hours, pop in freezer for an hour and push soap out one end. Slice to desired thickness. I typically get a full gel using PVC pipe. These are the molds that I use in all of my Cold Process Soap classes that I teach. They’re inexpensive and can be used over and over again.

Great idea! PVC pipe warmed at 200 degrees for 20 mins. Then squished with rolling pin.
Shoe boxes and other cardboard boxes – These molds need to be lined. They must be insulated well if you want a full gel*. Use towels, blankets and even a warm heating pad to help force gel*.
Plastic storage boxes and Tupper Ware containers – If containers are thicker and not easily flexible, you will need to line in order to remove your soap easier. If the container is more flexible, then you may not need to line. They must be insulated well if you want a full gel. Use towels, blankets and even a warm heating pad to help force gel*.
Silicone Baking Ware – Great for soaping!
These types of molds do not require lining and soap is easily removed
because of the flexibility. They must be insulated well if you want a
full gel*. Use towels, blankets and even a warm heating pad to help force
gel*. Since silicone can withstand high heat, you can even put your mold
in a warm oven to help force gel*.
Pringles Cans – Can be used lined or not. If not lined, you can simply peel the container away from the soap and throw away. If you line with freezer paper, you can sometimes get more than one use out of the container. They must be insulated well if you want a full gel* or can be put into the fridge or freezer to prevent gel*.
Orange Juice Containers – Square cardboard orange juice containers make great molds and produce large square bars of soap. You do not need to line them since they have the waxy coating to begin with. Once your soap hardens you can peel away the container. They must be insulated well if you want a full gel* or can be put into the fridge or freezer to prevent gel.*
Other molds you can use include wooden drawers, cigar boxes, shipping tubes…the list goes on and on.
(* Gel as used above:
Soap gels during saponification. If
it is your first time, you may look at your soap in the mold and be
very worried if you catch it in gel. It may turn clear or look like
vaseline and the mold will be hot to the touch. This is a normal part
of saponification, but not all soaps gel. You will find milk soaps
generally gel no matter what you do. Others you may have to force to
gel by covering and insulating. Soap that does not gel will still be
lovely though softer when you go to cut it - it will harden up later
though! )
Originally Posted on http://www.lovinsoap.com/2010/07/choosing-a-mold-a-cold-process-soapmaking-tutorial/


Hi Jessie - This content is from my blog. You can't actually copy and paste onto your blog. You're welcome to grab an image and write your own text and link to my blog. Please remove and contact me if you have any questions. amanda@lovinsoap.com
ReplyDeleteThanks! Amanda
Great tutorial! I love the step-by-step soap-making tips — and it also reminds me how useful a good container for soap can be once the bars are finished. A proper soap container keeps the soap dry, lasting longer and makes it easy to store or display. Whether for gifting or everyday use, choosing the right container for soap adds convenience and style. Thanks for sharing!
ReplyDelete