Sunday, December 29, 2013

DIY - Choosing a mold – A Soapmaking Tutorial

Choosing a mold – A Soapmaking Tutorial

There are many types of molds you can use for soaping ranging from more expensive wooden loaf and slab molds to inexpensive “found” molds including Pringles cans, yogurt cups and shoe boxes.

Wooden Loaf Molds – These molds must be lined using freezer paper or other method of lining. In my experience, soap usually gels* without added insulation. Soaping in colder climates might require more insulation such as towels or blankets to help force gel* completely. You’ll want to purchase a mold made of a hard wood such as poplar that is untreated. Treated wood can react if exposed to unsaponified soap as well as to heat in your oven if you choose to use your mold in the oven for any reason (such as forcing gel*).


Wooden Slab Molds – Same as wooden loaf molds.

Plastic or PVC Slab Molds – These are nice if you do not want your soap to gel. Some soapers even put these into the fridge or freezer to stop gel. If you do want to gel your soap, insulate well. You can try wrapping your mold in towels and even putting it on top of a warm heating pad to add heat and help force gel*. Soap can be trickier to remove from plastic molds especially if un-gelled or if molds have intricate designs and crevices. Try preparing your mold with mineral oil or add beeswax to your recipe to help release your soap easier.

Individual Cavity Molds – same as Plastic or PVC Slab Molds. Individual cavity molds are especially good for salt bars as they don’t require cutting.

PVC Pipe – Great for making round soap. Molds don’t need to be lined but can be prepared with mineral oil to help soap release easier. After pouring in soap, cover with plastic wrap and a dish towel to insulate the top of mold. Leave soap in mold for 24-48 hours, pop in freezer for an hour and push soap out one end. Slice to desired thickness. I typically get a full gel using PVC pipe. These are the molds that I use in all of my Cold Process Soap classes that I teach. They’re inexpensive and can be used over and over again.
 Great idea! PVC pipe warmed at 200 degrees for 20 mins.  Then squished with rolling pin.
Great idea! PVC pipe warmed at 200 degrees for 20 mins. Then squished with rolling pin.

Yogurt cups, Cream Cheese containers and other plastic food containers – Great for small batches or “overflow”. I keep a handful of these containers around for left over soap after I’ve poured my wooden loaf mold. They do not need to be lined.

Shoe boxes and other cardboard boxes – These molds need to be lined. They must be insulated well if you want a full gel*. Use towels, blankets and even a warm heating pad to help force gel*.

Plastic storage boxes and Tupper Ware containers – If containers are thicker and not easily flexible, you will need to line in order to remove your soap easier. If the container is more flexible, then you may not need to line. They must be insulated well if you want a full gel. Use towels, blankets and even a warm heating pad to help force gel*.

Silicone Baking Ware – Great for soaping! These types of molds do not require lining and soap is easily removed because of the flexibility. They must be insulated well if you want a full gel*. Use towels, blankets and even a warm heating pad to help force gel*. Since silicone can withstand high heat, you can even put your mold in a warm oven to help force gel*.


Pringles Cans – Can be used lined or not. If not lined, you can simply peel the container away from the soap and throw away. If you line with freezer paper, you can sometimes get more than one use out of the container. They must be insulated well if you want a full gel* or can be put into the fridge or freezer to prevent gel*.

Orange Juice Containers – Square cardboard orange juice containers make great molds and produce large square bars of soap. You do not need to line them since they have the waxy coating to begin with. Once your soap hardens you can peel away the container. They must be insulated well if you want a full gel* or can be put into the fridge or freezer to prevent gel.*

Other molds you can use include wooden drawers, cigar boxes, shipping tubes…the list goes on and on.

(* Gel as used above:
Soap gels during saponification.  If it is your first time, you may look at your soap in the mold and be very worried if you catch it in gel.  It may turn clear or look like vaseline and the mold will be hot to the touch.  This is a normal part of saponification, but not all soaps gel.  You will find milk soaps generally gel no matter what you do.   Others you may have to force to gel by covering and insulating.  Soap that does not gel will still be lovely though softer when you go to cut it - it will harden up later though!  )
Originally Posted on http://www.lovinsoap.com/2010/07/choosing-a-mold-a-cold-process-soapmaking-tutorial/

Aromatherapy For The Winter Blues

DIY Aromatherapy For The Winter Blues


Originlly Posted on http://www.theyummylife.com/Natural_Room_Scents

Here's the thing. I'm married to a man who hates artificial scents of any kind. That goes for air fresheners, candles, perfume, soaps and anything else that is scented. We buy unscented everything. I could probably buy a car with the money I've saved on perfume throughout the years of our marriage.

Turns out that King-Man may just be ahead of his time. I've recently been reading about air fresheners and their harmful ingredients. Many of them are especially hard on people with allergies and asthma. One more thing to stay away from.

But, the air in my house gets stale sometimes. Or, the day after I've cooked with garlic, that aroma that was so appealing when I was cooking becomes very unpleasant. I want to walk into my house and have it smell pleasant. Nothing overpowering or even that noticeable. Just pleasant.

There is a simple, all natural, truly lovely solution. That is to fill the air in my home with subtle scents of spices, herbs, and fruit. All I have to do is simmer some sweet smelling ingredients in water. The steam fills the air with a pleasant scent. Truth is, I did this many years ago on the advice of our realtor when we were selling our house. Realtors often advise sellers to bake cookies or boil cinnamon water right before a potential buyer drops by. That inviting aroma goes a long way to leave a good first impression. Why I didn't continue scenting the air in a similar way for our own enjoyment, I don't know.  I've now got a simple routine going that keeps our house smelling pleasant without staleness or day-after garlic odor.

Keeping the supply list simple. I only used items available at the grocery store or in my yard for these scent recipes. I want this to be easy and inexpensive so that I can set up a sustainable routine of pleasantly scenting our home. These recipes are simply guidelines and don't have to be followed exactly. In fact, I change them up all the time based on what I have on hand in my kitchen or yard.

How to Make Natural Room Scents
Fragrant items for naturally scenting your home:
  • citrus -- I've tried other fruits. Some of them smell good initially, but they don't hold up for more than one use. Citrus is sturdier, longer-lasting, and gives these scent recipes freshness. Lemons and oranges are particularly fragrant and have the best staying power in these scented waters.
  • herbs -- Any herb can be used for making a room scent, but the ones that are sturdier and on woody twigs hold up the best. My favorites for room scents are rosemary and thyme.
  • pine or cedar twigs/needles -- There may be other fragrant trees that will work, too; pine and cedar are the two I've tried for their appealing, fresh fragrance.
  • extracts -- A touch of vanilla or almond extract improves most room fragrance mixtures. Mint extract has a nice fresh scent. You can also use whole vanilla beans instead of vanilla extract; pricey but amazingly fragrant. Amazon has a good bulk price (80% less than grocery store prices).
  • spices -- You can use ground or whole sweet spices. The whole spices look prettier, if your scented water will be in a location where it will be seen. I have found that cinnamon sticks and whole cloves have the most scent staying power. Cinnamon sticks can be rinsed off and reused several times. They keep on giving.

Scents_for_home2.jpg
Five Natural Room Scent Recipes
These are all scents that my nose likes. But, scents that are pleasing to one person may not be to someone else. Consider how many different scents of perfumes, soap, and candles there are in stores in an effort to appeal to the masses. So, use my recipe combos as guidelines that you can tweak and customize to suit what your nose likes.

General procedure: Combine the ingredients in a 2 cup (pint) jar or container, or in a pan on the stove top. Cover them with water and heat. I'll explain different heating options further down. Keep reading.
Scent #1: Oranges, cinnamon & cloves (allspice and anise are optional). This is my favorite, both for it's wonderful aroma and for it's staying power. This scent carries into multiple rooms better, and it can be reheated to scent your rooms for several days.Scents_for_home4.jpg

Scent #2: Lemon, rosemary, & vanilla. A similar scented water is often simmering in Williams-Sonoma stores. It has a lovely freshness to it.  Scents_for_home5.jpg

Scent #3: Lime, thyme, mint & vanilla extract. This combination has such a fresh, pleasant scent. I initially made it without the mint extract, but have found that it really kicks up the aroma.Scents_for_home6.jpg

Scent #4: Orange, ginger (fresh or powdered), and almond extract. This is a sweet, delicious scent. Scents_for_home7.jpg

Scent # 5: Pine or cedar twigs (or other fragrant twigs), bay leaves, and nutmeg. These scents combine for a complex aroma. If you have whole nutmeg, use a microplane to grate off the outer surface--this will release the scent. Add the whole nutmeg piece along with the gratings.
not_used5.jpg

Here's the gang of five. Aren't they beautiful? I like to make these up in pint jars and keep them on hand in the fridge so I'm ready to start a pot of simmering scents as needed. IMG_3846.jpg

Make ahead and...
  • ...store in the fridge. Uncooked jars of scented waters will keep in the fridge for 1 to 2 weeks, so you can make these ahead to have on hand. I recommend adding all of the ingredients, including the water, to the jars before refrigerating them. I've tried refrigerating the fruit/spice/herb combos in jars without the water, but they don't last as long that way.
  • ...freeze them.  I've tried freezing them both with and without the water added, and both ways work fine. I haven't tested them in the freezer longer than 2 weeks, but I'm confident that they can be frozen for a month or longer. Make sure you use freezer-safe jars like these pint wide-mouth mason jars. (Not all mason jars are freezer-safe.)
How to heat the scented mixtures
I've tried a variety of methods, and all of these work to varying degrees. Some of them provide a more powerful scent than others. Just like the air fresheners you buy, none of these will scent a whole house; but I'll show you some ways to set up individual scent sources in multiple rooms. Hopefully you already have what you need to try out one or more of these options.

Stove top method. This is by far the best way I've found to get the most powerful scent that will spread to more rooms the fastest. It's easy as can be. Simply combine the ingredients in a pot on the stove, bring them to a boil, and then lower the heat to a simmer. They will immediately begin to scent your kitchen and spread to other rooms. How far the scent spreads depends on the size and layout of your house. A simmering pot like this makes all four rooms on our first floor smell good. The only drawback of this method is that you have to keep a close eye on the water level. If the pan dries out, you'll be smelling burned citrus instead of sweet, fragrant citrus.  NOTE: For a stronger scent, simply double or triple the recipe in a larger pot on the stove.
IMG_3901.jpg

Uncovered Slow Cooker Method. This is my personal favorite. I use a mini slow cooker--the kind made for keeping dips and sauces warm. Mine only has one low heat setting. The mixture never actually bubbles and visibly steams. I leave it uncovered on my kitchen counter to slowly release scent throughout the day. It's subtle, but creates a pleasant smell in my kitchen and a hint of scent in surrounding rooms. When I'm home, I keep my mini slow cooker going. It's easy and uses very little electricity. When I fill mine in the morning, it won't dry out for an entire day. If you're concerned about accidentally letting it run dry, you can put a lamp timer on it so that it automatically shuts off at the desired time. I put a scented jar mixture in the microwave for 2 minutes to get it really hot before I add it to the slow cooker. That gives it a jump start on releasing the scent.  NOTE: For a stronger scent, simply double or triple the recipe in a larger, full-size slow cooker and set it on high.

16 oz. mini slow cooker --holds a single batch--compact & economical--removable insert for easy cleaning; this is the size I use for regularly simmering scented water in my kitchen and is a great size for gift giving, too.
1-1/2 qt. small slow cooker  --holds double or triple batch--removable insert for easy cleaning; the larger size doesn't have to be refilled as often.
on-off lamp timer --for auto shut-off
Scents_for_home9.jpg

Fondue Pot Method. If you have a fondue pot, then you have a portable scent station. Set it up in any room you'd like to scent. Below is a small ceramic fondue pot I have that uses a tea light for heat. So, this will only remain warm as long as the candle lasts--3-1/2 to 4 hours. Like the slow cooker, this is a low level of heat and releases a very subtle scent--enough for a small room. Get the scent mixture boiling hot before adding it to the fondue pot. I like to set this up in our entry way when we have guests. It makes it smell wonderful when you walk through our front door. And, it looks pretty.
IMG_3882.jpg

Mug Warmer Method. I normally keep this little mug warmer next to my computer to keep my coffee and tea warm. I've discovered it also can be used to keep a jar or small bowl of scent mixture warm. It only keeps it warm, it doesn't actually heat it up. So again, be sure to heat the mixture before adding it the bowl. Or microwave a jar and set it right on top of the mug warmer. This low heat puts off a soft, subtle scent that is suitable for a small area like a bathroom.
  • Here's a hint to keep it pretty. As the mixtures cook and lose their color, they're not as attractive. You can spruce it up by floating a fresh slice of citrus on top. Or add a few cranberries (I keep a bag of them in my freezer); they float and add a touch of color.
Scents_for_home11.jpg

Candle Warmer Method. These work just like the mug warmers. Candle warmers come with a little bowl on top for melting scented candle pellets. Instead, you can add some heated scented water. Or, remove the bowl and set a jar or other bowl on top.
  • Note: I tested the temperatures of these with a thermometer. The mug warmer and candle warmer both kept the mixture at about 120°F. That's enough to let off a very subtle scent in a small area or room, but don't expect these to strongly scent a big room. You need more heat and steam for a stronger scent.
Scents_for_home13.jpg

Tea Pot Warmer Method. My tea pot warmer also uses tea lights. I can put two or three tea lights in mine to achieve the temperature I want. These only last as long as the tea lights burn, but they can get hotter than the mug and candle warmers, thus releasing more scent. I can put a bowl or jar on top of my tea pot warmer, as long as I put it somewhere that I can keep an eye on it. I don't like to leave candles unattended.
view on Amazon:  cast iron teapot warmer
Scents_for_home12.jpg

Add more hot water as needed. As the water evaporates from any of these warming bowls or jars, top it off with additional HOT water. It needs to be hot when it's added so that it doesn't cool down the temperature of the scented water.  Higher heat = more fragrance.

Gift them! These make a fun, unique hostess gift. Take one along to a party as a gift for your host that can be simmered and enjoyed the next day.

Reuse each mixture 2-3 times. After these have been heated and simmered for awhile, the water becomes cloudy (as you can see in the jars below), and some of the ingredients lose their vibrant color. Although they don't look as pretty, they still smell good. Usually, you can reheat and simmer these again 2-3 times. Jar them up and refrigerate them between uses. Open the jar and give it the sniff test--if it still smells good, reheat and reuse it. Add more water as needed.Scents_for_home10.jpg

Cost saving tips
You can save, use and reuse a number of fragrant ingredients. These scents don't need to be expensive.

  • Leftover ginger --  If you ever cook with fresh ginger and end up with leftover pieces , this is a way to use them up before they spoil. Slice the leftover ginger and freeze it in a bag or container to have on hand for whipping up a quick batch of scented water. 
  • Save your orange peels -- When you eat an orange, save the peel for use in scented waters. Store them in the refrigerator or freezer until you need them.
  • Save your juiced lemons and limes -- After you've juiced these for use in a recipe, refrigerate or freeze the leftover pieces.
  • Save your leftover herbs -- If you have herbs in a garden or have leftover herbs that you've purchased for cooking, they can be frozen and saved for use in these scented waters.
  • Use expired juices. If you have fruit juices that are past their prime, use them as a base in place of the water in these mixtures. They're both fragrant and colorful.
  • Use expired spices. Spices are supposed to be replaced after a year, because they lose much of their flavor. But, they still smell good! Instead of throwing out old spices, use them for scenting water.
squareIMG_3862.jpg

There are endless combinations for these scented waters
..

Thursday, December 26, 2013

'Herbal Explosion' of honey & herbal blend of eucalyptus, spearmint, and a hint of basil

'Herbal Explosion' Havenly Honey Soap BY JESSIEPEARL'S HANDMADE SOAPS.

Invigorate your body with this herbal blend of eucalyptus, spearmint, and a hint of basil to mellow your mood. This clean fragrance will ignite your senses, giving you the ultimate bathing experience.

Ingredients: Olive Oil, Coconut Oil, Palm Oil, Distilled Water, Sodium Hydroxide (lye) , Havenly Honey, Castor Oil, eucalyptus, Spearmint, and Basil Fragrance Oil.

Due to being completely handmade and hand cut, each bar of soap is approximately 4.5-5.5 oz..

Two Bars of  'Herbal Explosion' Havenly Honey Soap with herbal blend of eucalyptus, spearmint, and basil to mellow your mood
  Havenly Handmade Soaps are made utilizing delicious and beneficial honey and beeswax. All recipes contain all natural ingredients that were hand selected by the talented Blue Haven Bee Team!

Honey has a naturally delicate, sweet scent and has unbelievable moisturizing qualities. It gives our Havenly Honey Soap a rich lather while offering anti-bacterial, anti-inflammatory, and therapeutic qualities.

Combining honey and lye, Havenly Honey soaps help skin irritations, acne, poison ivy, and it can even help aging and wrinkles!

No dyes are used during the soap making process. Our Havenly Honey offers its own beautiful color; you can even see the layers of honey in our soap!

https://www.etsy.com/listing/167132695/two-bars-of-herbal-explosion-havenly?ref=shop_home_active
..

"Bee Happy" Havenly Honey Soap With delightful notes of Mandarin oranges, tangy citrus, and sweet basil

"Bee Happy" Havenly Honey Soap With delightful notes of Mandarin oranges, tangy citrus, and sweet basil BY JESSIEPEARL'S HANDMADE SOAPS.

'Bee Happy' Havenly Honey Soap will Energize your spirit and improve your well being. Evoke your inner happiness today.

Ingredients: Olive Oil, Coconut Oil, Palm Oil, Distilled Water, Sodium Hydroxide (lye) , Havenly Honey, Castor Oil, Mandarin, Lime and Basil Fragrance Oil.
Bee Happy Havenly Honey Soap With delightful notes of Mandarin oranges, tangy citrus, and sweet basil - Two bars  .   Havenly Handmade Soaps are made utilizing delicious and beneficial honey and beeswax. All recipes contain all natural ingredients that were hand selected by the talented Blue Haven Bee Team!

Honey has a naturally delicate, sweet scent and has unbelievable moisturizing qualities. It gives our Havenly Honey Soap a rich lather while offering anti-bacterial, anti-inflammatory, and therapeutic qualities.

Combining honey and lye, Havenly Honey soaps help skin irritations, acne, poison ivy, and it can even help aging and wrinkles!

No dyes are used during the soap making process. Our Havenly Honey offers its own beautiful color; you can even see the layers of honey in our soap!

By using simple, fine ingredients, our olive oil based soaps are like your grandma used to make it!

Stop using harsh, detergent based soaps & try a bar today! See for yourself the true benefits of Havenly Honey Soap!
 
 ..

Soothing Lavender Sage Honey Soap

Two Bars of Soothing Lavender Sage Honey Soap BY JESSIEPEARL'S HANDMADE SOAPS.

Indulge with the relaxing essence of lavender and revitalize your body & mind with soothing sage. Provoke your inner harmony with this deep, meditative scent!

Ingredients: Olive Oil, Coconut Oil, Palm Oil, Distilled Water, Sodium Hydroxide (lye) , Havenly Honey, Castor Oil, Lavender, Sage and Basil Fragrance Oil.

Due to being completely handmade and hand cut, each bar of soap is approximately 4.5-5.5 oz..
Two Bars of  Soothing Lavender Sage Honey Soap with the relaxing essence of lavender to revitalize your body & mind

Havenly Handmade Soaps are made utilizing delicious and beneficial honey and beeswax. All recipes contain all natural ingredients that were hand selected by the talented Blue Haven Bee Team!

Honey has a naturally delicate, sweet scent and has unbelievable moisturizing qualities. It gives our Havenly Honey Soap a rich lather while offering anti-bacterial, anti-inflammatory, and therapeutic qualities.

Combining honey and lye, Havenly Honey soaps help skin irritations, acne, poison ivy, and it can even help aging and wrinkles!

No dyes are used during the soap making process. Our Havenly Honey offers its own beautiful color; you can even see the layers of honey in our soap!

By using simple, fine ingredients, our olive oil based soaps are like your grandma used to make it!

Stop using harsh, detergent based soaps & try a bar today! See for yourself the true benefits of Havenly Honey Soap!

https://www.etsy.com/listing/167133203/two-bars-of-soothing-lavender-sage-honey?ref=related-0
..

Three Different Bars of Soothing Honey Soaps


Three Bar Honey Soap Combo with a bar of each of our  Soothing and relaxing Honey made soaps

One Each of our Three Bars of Soothing Honey Soaps BY JESSIEPEARL'S HANDMADE SOAPS.

Soothing Lavender Sage Honey Soap
'Herbal Explosion' Havenly Honey Soap
'Bee Happy' Havenly Honey Soap

Havenly Handmade Soaps are made utilizing delicious and beneficial honey and beeswax. All recipes contain all natural ingredients that were hand selected by the talented Blue Haven Bee Team!

Honey has a naturally delicate, sweet scent and has unbelievable moisturizing qualities. It gives our Havenly Honey Soap a rich lather while offering anti-bacterial, anti-inflammatory, and therapeutic qualities.

Combining honey and lye, Havenly Honey soaps help skin irritations, acne, poison ivy, and it can even help aging and wrinkles!

No dyes are used during the soap making process. Our Havenly Honey offers its own beautiful color; you can even see the layers of honey in our soap!

By using simple, fine ingredients, our olive oil based soaps are like your grandma used to make it!

Stop using harsh, detergent based soaps & try a bar today! See for yourself the true benefits of Havenly Honey Soap!

Yes- it is "heavenly" as well as "havenly"

````````````````

We offer Handmade Soaps made in small batches using high quality Essential Oils, Herbs and other natural soap making ingredients.

Our soap bars are not meant to be cute and displayed on a shelf - they are meant to be used to moisturize your body, make you smell good.and most importantly to clean your skin.

Our over sized bars are carefully handmade in small batches so they may vary slightly, Each bar weighs approximately 5+/- oz each. That's a big enough bar to cut in half to share or to prolong it's useful life.

https://www.etsy.com/listing/167134025/three-bar-honey-soap-combo-with-a-bar-of?ref=shop_home_active
..

Wednesday, December 25, 2013

DIY - HERBS FOR SOAP MAKING

Great selection of bulk herbs, books, and remedies. Articles, Research Aids and much more.  About Us

When we were growing up, herbs were like tomatoes. We grew them. We put them up for the winter. We used them daily, and gave concoctions away to other people in need of them. My mother was always teaching us. If we were weeding the garden, she would talk about which weeds were herbs and what those herbs could do. She instilled in us a passion to learn and create.

Now at the Bulk Herb Store we provide our homemade concoctions, our experiences, and the tested wisdom of others.

We want to do more than sell quality herbs. We want to teach you what we know and inspire you to learn and research beyond that.

For Soap Making Herbs you can't beat the  Bulk Herb Store
Great selection of bulk herbs, books, and remedies. Articles, Research Aids and much more.

Happy herbaling!

Great selection of bulk herbs, books, and remedies. Articles, Research Aids and much more. 
.. 

Monday, December 23, 2013

Pear Handmade Sugar Scrub

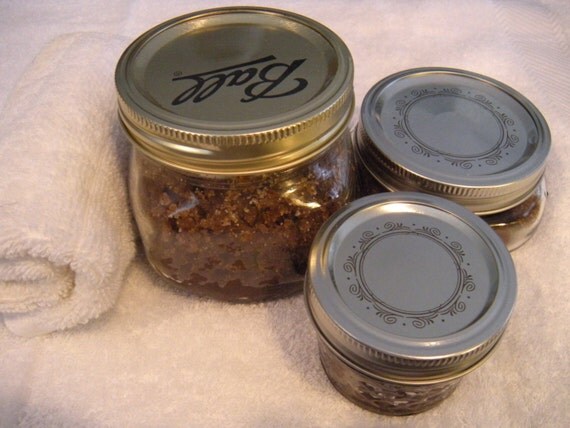
Pear Handmade Sugar Scrub in 4 or 8oz Ball jar. The scents of the Holiday Season in a Ball Jar.

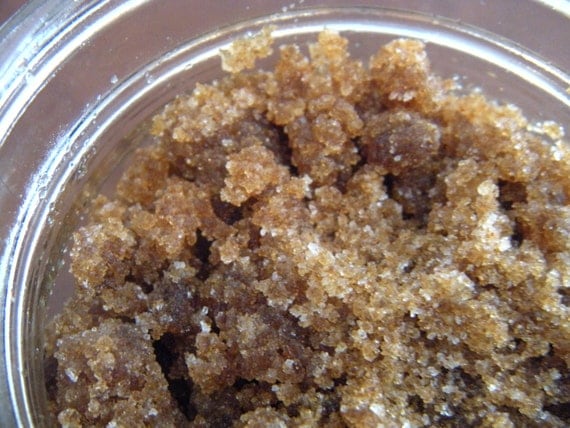
Pear Scented Gardener's Hand Scrub in 4 oz jar that smells like the holidays - Hand & Foot Scrub  Working in the dirt? We have sugar to get the grit and liquid soap to wash it away. A little dab will do you.

Also a terrific Foot Scrub by Jessiepearl. The skin loving oils in this scrub will help to leave you soft, smooth & moisturized.

Scrub hands, feet, knees and elbows and rinse with warm water. Pat dry and let oils naturally absorb into the skin.

Ingredients: white sugar and carrier oil with pear fragrance oil.

Ingredients MUST be stirred before each use as they will separate when standing.

Caution - Tub or shower can become slippery. It would help to put mat or towel on the tub floor.

Store in sealed container out of direct sunlight and out of the reach of children.

Available in a 4 or 8 oz wide mouth Ball Jar.

https://www.etsy.com/listing/167141243/pear-scented-gardeners-hand-scrub-in-4?ref=shop_home_active
..

Pumpkin Pie Handmade Sugar Scrub

Pumpkin Pie Handmade Sugar Scrub 4, 8 and 16oz Ball Jars. The scent of Thanksgiving and the Holiday Season in a Ball Jar.

A terrific Hand & Foot Scrub by Jessiepearl. The skin loving oils in this scrub will help to leave you soft, smooth & moisturized.

Scrub hands, feet, knees and elbows and rinse with warm water. Pat dry and let oils naturally absorb into the skin.

Ingredients: Pumpkin Pie Spice, Brown Sugar, White Sugar and Grapeseed Oil.

Caution - Tub or shower can become slippery. It would help to put mat or towel on the tub floor.

Store in sealed container out of direct sunlight and out of the reach of children.

Available in 4, 8 and 16oz Ball Jars.    4oz Pumpkin Pie Sugar Scrub in 4 oz jar that smells like Thanksgiving - Hand & Foot Scrub

````````````````
We offer Handmade Scrubs made in small batches using high quality Essential Oils, Herbs and other natural ingredients.

https://www.etsy.com/listing/167138784/4oz-pumpkin-pie-sugar-scrub-in-4-oz-jar

Lemon Handmade Sugar Scrub - The scents of the Holiday Season in a Ball Jar.

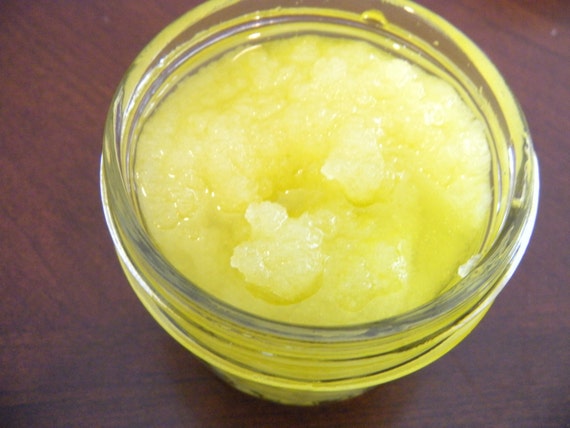
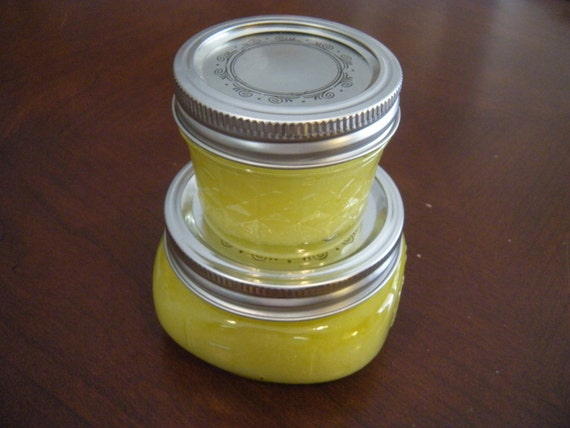
Lemon Handmade Sugar Scrub in 4 or 8 oz wide mouth Ball jar. The scents of the Holiday Season in a Ball Jar.
Lemon Sugar Scrub in Large 8 oz jar that smells like the holidays - Citrus Scented Hand & Foot Scrub  A terrific Hand & Foot Scrub by Jessiepearl. The skin loving oils in this scrub will help to leave you soft, smooth & moisturized.

Scrub hands, feet, knees and elbows and rinse with warm water. Pat dry and let oils naturally absorb into the skin.

Ingredients: white sugar and carrier oil with Lemon fragrance oil.

Ingredients MUST be stirred before each use as they will separate when standing.

Caution - Tub or shower can become slippery. It would help to put mat or towel on the tub floor.

Store in sealed container out of direct sunlight and out of the reach of children.

Available in a 4oz and 8oz Ball Jar              .

````````````````
We offer Handmade Scrubs made in small batches using high quality Essential Oils, Herbs and other natural ingredients.

https://www.etsy.com/listing/167183712/lemon-sugar-scrub-in-large-8-oz-jar-that?ref=shop_home_active

..

Sunday, December 22, 2013

BATH SALTS - A DRUG OR A SOOTHING BATH ADDITIVE ??

BATH SALTS - A DRUG OR A BATH ADDITIVE ?? 

The so called Bath Salts in the news is a "designer drug" made from combining the synthetic chemicals MDPV, methylone, mephedrone, and pyrovalerone, though many other ingredients can be included. Think of drug called "bath salts" as a combination of LSD and Meth. 

 DO NOT CONFUSE the "drug" with actual Bath Salts made with Epsom Salts, Dead Sea Salts and other common mineral bath additives that is intended to increase the soothing properties of your bath. 

How to Make Lavendar Bath Salts #DIY #Gift from utryit.com, featured @savedbyloves   Ever wondered why your body feels so great after a dip in the ocean?  In addition to its beauty and soothing sound, the salty ocean super charges your body by detoxing it through your skin AND relieving aches and pains in your muscles and joints! 

How?  It’s the salt!  The ocean is like a big miracle worker and using Bath Salts is like having the ocean in your home! 

Bath Salts include Dead Sea Salts, Sea Salts, Epsom salts and a touch of Essential Oils.  The salts are composed of minerals which are not only critical for great collagen in your skin, but for your soft tissues as well.

..

The Many Benefits of Fresh Ground Coffee And Kosher Salt Scrub

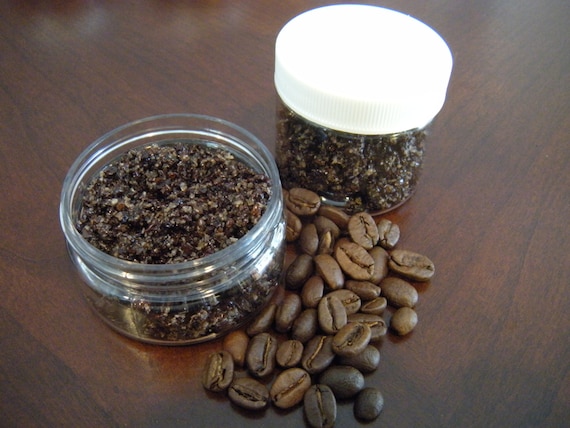
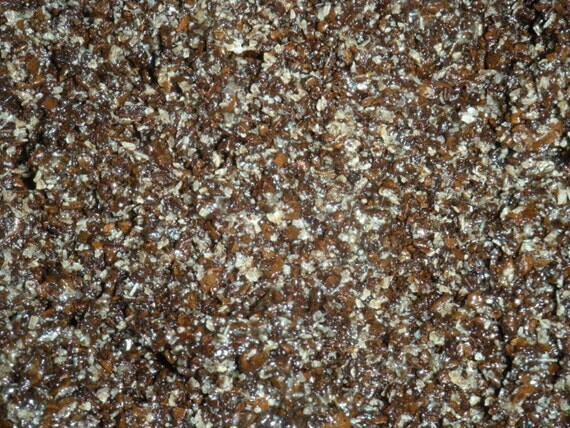
Fresh Ground Coffee And Kosher Salt Scrub with Shea Butter
Fresh Ground Coffee and Kosher Salt Scrub with Shea Butter - 2oz plastic jar

Great Kitchen Hand Scrub - Neutralizes odors on hands from garlic, onions and fish.

Also known as a Anti-Cellulite Scrub

Cellulite is a woman’s worst enemy and has no age nor weight restrictions, it’s that stubborn fat with ugly dimples on your stomach, thighs, buttock and arms, that seems almost impossible to get rid of. It’s a Brazilian secret! That’s why Brazilian women have amazing seemingly flawless toned bodies. Also many dermatologist use this secret charging you high prices for this simple treatment.

What is it? It’s coffee with caffeine! The caffeine helps reduce some of the edema around fat to help women look smoother.

So simple you’ll be amazed. After using this method on a daily bases for several weeks you should see a remarkable difference provided that you also keep a clean & healthy diet!

~~~~~~~~~~

Smooth cream onto problem areas then massage in a circular motion, do this for several minutes. Rinse off and pat dry..

Ingredients:ground coffee, kosher salt and shea butter.

Ingredients MUST be stirred before each use as they will separate when standing.

Caution - Tub or shower can become slippery. It would help to put mat or towel on the tub floor.

Store in sealed container out of direct sunlight and out of the reach of children.

This offer is for a 2oz plastic jar and it ia also available in 4oz and 8oz Ball Jars.

The salt acts as an exfoliant and scrub, while the Shea Butter works to smooth and hydrate your skin, the coffee does the magic!

~~~~~~~~~~~~~~~

Benefits of Coffee Scrub

Aromatherapy
Coffee oil is often used in aromatherapy treatments. The scent of coffee acts to clear a person’s mind of excessive thoughts. The scent also works as an anti-depressant and can combat feelings of nausea. Using a coffee body scrub will allow you to take advantage of its aromatherapy features.

Antioxidants
The main chemical in coffee is caffeine, a natural antioxidant. Antioxidants have many benefits, including heart disease- and cancer-fighting properties. Antioxidants also neutralize the effects of free radicals, which can damage the inner layer of skin. This damage is often reflected in age spots and wrinkles. When a coffee body scrub is applied, the skin absorbs this antioxidant and can help prevent premature aging.

Exfoliation
Because coffee scrubs are made with coarse grounds and salt or sugar, they act as exfoliates for the skin. Regular exfoliation of the skin removes residual dirt and dead skin to give you younger looking, fresh skin. After the skin is exfoliated, it is able to absorb moisture more effectively as well. All beauty regimens should include exfoliation treatments, and the coffee scrub provides it.

Blood Flow
Some people use coffee body scrubs to combat the occurrence of varicose veins. The caffeine found in coffee scrubs typically increases blood flow and may reduce the appearance of cellulite. Even the action of applying the coffee scrub can help with these types of skin issues because squeezing and massaging the body helps to release toxins and fats held in the skin.

Skin Texture
Caffeine is a vasodilator, which means it constricts blood vessels in the skin. This action works to make blood vessels tighter and firmer very quickly, which is reflected in your skin texture.

(Health Benefits posted from ~ http://www.ehow.com/list_7216438_benefits-coffee-scrub_.html)

````````````````
We offer Handmade Scrubs made in small batches using high quality Essential Oils, Herbs and other natural ingredients.  https://www.etsy.com/listing/167366059/fresh-ground-coffee-and-kosher-salt?ref=related-0
..


Saturday, December 21, 2013

Dangerous Soap Designs

Dangerous Soap Designs

We have all heard on the TV news the dangers of the laundry detergents and dishwasher soaps that are shaped and brightly colored to the point they look like candy.  When these little packages are away from their original box or bag, anyone can make the mistake.

Kids are especially vulnerable to this misleading look  They do not know that soap can look like anything other than that bar they see in the soap dish.  They don't know that something that looks like candy may not be candy and should not be put in the mouth.

Think about it.  If it stays in the soap dish and your child sees that everyone washes their hand with it - then that is what you are suppose to do with it.  But you child probably never sees this candy looking stuff  being used, therefore, it must be because it disappears into someones mouth.

We blame this type confusion on the Big Corporate Giants who make this type of soap just to generate sales based on the "convenience of use" by the adult rather than the documented harms of misuse by that adult's child.  Convenience sells and the rest can be hidden.

So much for the Big Corporate Giants.   Now what about the small independent creative soap maker. 

We do not sell basted on convenient packaging.  We sell based on natural ingredients vs dangerous chemicals.  We market  based moisturizing claims and exfoliation claims and aromatherapy claims.  We also market our soaps based on visual appeal - swirls, layers, colors and shapes - But it still looks like soap to adults and it still looks like soap to children.

It starts out as a desire to make better soap but we are creative creatures.  We like to make bigger, more outstanding and different eye catching masterpieces.  Not just boring looking bars. 

The right to be creative must be maintained in the independent soap world but, allow me to point out that when we deliberetly make and market an item and publish the fact that it "Looks Like a Brownie", "Just Like a Cupcake", "A Repleca Of" a Delicious Pecan Pie Complete with Whipped Cream, An "Exact Copy" of your favorite Red Velvat Cake , Etc, Etc.then we must take on the responsibility of also pointing out the dangers to children that this intentional food lookalike design may have.

I do not claim to know what to say when marketing these delicious looking creations.  I do know that we should be caring and responsible enough humans to point out that using any product with peppermint essential oil it is not recommended for use in pregnancy. and to onsult your doctor before using peppermint soap.  There may also be a problem with someone who suffers from nut allergies, therefore, it is only right to disclose: - If you have a known allergy to tree nuts, you may experience a reaction to Shea butter. Consult your physician or allergist before using this product, if this is the case.  I hope these things are common sence if you use those ingredients.

If those disclosures are morally correct, then how can you not disclose the dangers to Children who may ingest this marvelous cookie or brownie look alike.  A simple "Keep Out Of Reach Of Children" or "Not Food - Keep Away from Mouth", Etc.may or may not be enough to avoid a terrible accident but it is a heck of a lot better than not saying anything.  You are the expert - you are not the buyer who is buying only because you made it look delicious and who thinks you are selling something you know to be safe for the entire family.

Excuse the "Soap Box" but it is "Better To Be safe than Sorry" is still one of the best of all old sayings.

..


Wednesday, December 18, 2013

DIY The Best Most Complete Soap Business How-To


How To Start Your Own Soap Business 


Originally Posted By:  http://blog.worldlabel.com/2010/how-to-start-your-own-soap-business.html 
by Marla Bosworth

Have you been dreaming about starting your own soap making business, but aren’t sure where to start?

While launching your own company is not entirely difficult, it does take time and thoughtful preparation in order to create a successful business. This white paper is intended to provide you with a general overview of important steps required.

I started my soap business, Back Porch Soap Company, in 1998. Over the years and after much hard work, my company now sells to more than 200 wholesale accounts. I also sell retail via my website and upscale retail shows. In addition, I teach soap making, bath and body workshops, and business classes. I’ve made many costly mistakes along the way — especially in the beginning stages — which I will share with you in hopes of preventing them from happening to you.

At this point maybe you’ve considered making soap or perhaps you’ve been making soap for friends and family. That is how I started too. What kind of honest feedback are you getting about your product? Consider their ideas and inputs, but remember that the focus of your business is ultimately your own decision. One of the mistakes I made in the beginning was to take advice from too many people. It’s easy to say “Oh, I can create baby products for customer number one and pet products for customer number two.” Before you know it, you will have spread yourself too thin, lost your focus and racked up your credit cards. The best advice I can give for starting out is slow down, do your research, and plan your business. When you have your focus, then you can start buying more supplies and ingredients.

Let’s take a look at some essential guidelines.

Determining If This Business is Right For You
Are you the Entrepreneurial Type? Don’t Quit Your Day Job…Yet.
Building a part-time or full-time business takes time. It also takes money. So don’t quit your day job yet. Roll up your sleeves and be prepared to work on this new venture when you are not at your full-time job — evenings, weekends, whatever it takes. This is a great first indicator whether you have the passion and drive to be an entrepreneur.

Owning and running a soap business is not for the faint of heart. You will need a fire in your belly, resistance to failure (because it will come knocking at one point or another), undying enthusiasm for your products and business, and a driving passion. Again, you must be ready to dedicate most of your free time to this business to get it off the ground.

Some of the key qualities for a great entrepreneur are creativeness, a vision, confidence, can-do attitude, fearlessness, business savviness, and the ability to be a world-class multitasker. After all, you are going to be creative director, computer specialist, customer service rep, shipping agent extraordinaire, chief bottle-washer and janitor all wrapped into one (or at least until you have the funds to hire someone for these respective positions). You must be able to spot and seize opportunity and be open to changes in the marketplace.

Every successful entrepreneur I know is passionately obsessed about their business. They are constantly brainstorming — at various times of the day – ideas about ways to improve their business whether it be marketing, new products development and possible joint ventures or leveraging with other businesses. Is this you? Then read on!

Finding Your Niche
There’s a lot of soap out there. How are you going be different?
Have you noticed that there is a lot of handmade soap on in the U.S. market? I mean a ton. Just go to Etsy’s website and search for handmade soap. At last check, there were 311 pages with 21 listings per page. That’s 6531 bars of soap for sale!

You’ve got to set yourself apart. The best way to find a niche? Put yourself in your customer’s seat. Do some online market research to track trends. Is your niche market on the upswing in terms of growth? Or has it peaked? These are all questions to ask before you hit the pavement with your product offerings.
You’ll want to study your niche market to analyze potential product offers. Visit or call your nearest city librarian for great research tips. Most libraries provide free access to valuable databases which will allow you to search for market forecasts on retail markets, including personal care.

Some current niche markets include wedding favors, monogrammed or personalized soaps, organic, baby, tweens, male, and novelty soaps. Once you determine your niche, you can begin to develop your specific soaps and source ingredients, packaging and labels. You’ll want to test your products before launching them. Then test market to your potential customers by participating in retail shows where your particular client shops. Get feedback and suggestions. Once you are getting rave reviews take your product to market on a larger scale.

Ingredients and Supplies
Shop and Compare: Price, Quality and Customer Service
I have several suggestions as to where to purchase your supplies, depending on the size of the company you are about to launch. If you are certain that you will sell $2000 a week ($104,000 annually), go directly to the manufacturer if possible, especially with essential oils and fragrance oils. One of my favorite places to find manufacturers is Thomas Register (www.thomasnet.com). If your company is smaller, reply on reputable online suppliers whose names come up on the first page of Google.

If you are a cold process soapmaker, two of my favorite places to purchase plant oils are www.bulknaturaloils.com and www.soaperschoice.com. Both companies sell high-quality products at very reasonable prices.

Melt and pour soapmakers should head over to www.wholesalesuppliesplus.com. I’ve been purchasing my glycerin base from Debbie May for 12 years. You will love the quality. She also carries a wide variety of products which makes her site one-stop shopping headquarters and in addition offers various shipping arrangements.

There are a number of places to buy molds on the internet. Check out www.milkywaymolds.com, www.moldmarket.com, www.soapequipment.com, as well as chocolate or candy mold websites. For cold process soapmakers, check out www.forcraftssake.com, www.southernsoapers.com, www.uplandsoapfactory.com. Be sure to buy a cutter as well, it will save you a lot of time trying to evenly cut your soap and having them the same size.

When it comes to packaging your soaps there are many solutions. Most melt and pour soaps are best wrapped tightly with plastic wrap or shrinkwrap to prevent moisture or “sweating”. Cold process soaps are beautiful sold “naked”, wrapped in fabric or paper, as well as boxed. Fabric and handmade paper sources are plentiful. Boxes can be found on most soap making supplier’s websites.

A good rule of thumb in your initial months of operation is to buy only what you are going to use for one or two months. Invest in an inventory program such as Quickbooks or Soapmaker Software (the latter is available at www.soapmaker.ca) to help in your production planning and to eliminate overstocked supply waste.

When purchasing molds, splurge for high-quality ones that meet your needs. When I first began soapmaking, I went through numerous cold process molds, unhappy with one after another. Many of them had 30-day money back guarantees and I took full advantage of shopping around and finding the molds that fit my needs.

The same holds true for melt and pour molds. You’ll want pliable and flexible molds that can withstand soap after soap being released from it. Test, test, test. There were many times when I invested in molds before testing them, and added the soaps to my wholesale catalog only to find out that mass production with them became a nightmare.

Plan ahead with your molds and visualize your production process. How many soaps can you pour at a time? If you are using melt and pour molds do they line up on the tables so that you can pour 50-100 at a time? If you are a cold process soapmaker, consider investing in several high-quality loaf molds with built-in cutters that hold 14 lbs. or more
.
Remember, molds can be your best friend or your enemy! It is key to produce in quantity. Your time is equal to money. Become an efficiency machine. You’re going to need extra time between producing to dedicate to marketing and selling
.
Pricing and Profit Margins
Don’t undersell yourself.
Price your products so that you are making a profit — and keep in mind what your market will bear. Many new soap makers sell themselves short and later close up shop because their goal is to be the cheapest on the market. “Surely someone will buy my soaps if they are inexpensive.” I thought this when I first started my company too. Do not make this mistake. You deserve to get paid for your time – and you MUST factor your time into cost.

While traveling, I recently paid $7.00 for a 4 oz. bar of cold process handmade goat’s milk soap in a Wyoming garden shop. Now that’s a decent markup.

There is a perceived value in soap that is higher priced. When I see a $3 or $4 retail bar of soap my mind immediately thinks that it must not be worth purchasing. But for the higher priced bar, like the one I bought in Wyoming, I thought, “Wow, this must be handmade with care and high quality.” It was incredibly moisturizing, simply yet lovingly packaged, and it was worth every penny!

Keep in mind that if you are going to be wholesaling your soaps, that price will be half of your retail cost. Don’t expect to sell your soaps at craft fairs for $4 a bar, and expect a retailer to wholesale from you for $3. I sell most of my bar soaps for $6 retail, $3 wholesale. At retail shows I might offer a special, say $6 each or four for $20. Three out of four customers will go for the deal, and I’m happier with a $20 in my hand!

Let’s take a look at your markup or profit margins. This is what I take into account to determine my prices. Cost of goods include your ingredients, whether it’s plant oils, melt and pour base, essential or fragrance oils, additives and packaging. Remember to calculate the shipping you’ve paid on your cost of goods into the equation as well. Then add labor (even if you aren’t paying someone initially, you need to plan for this and also pay yourself). You may also want to add your overhead (rent, insurance, electricity, equipment, etc.).
Cost of Goods + Shipping + Labor + Overhead x 2 = Wholesale Price
  • Example: $0.70 per bar COG + $0.10 Shipping + Labor/bar $0.50 + Overhead $0.15 = $2.90/bar. So wholesale for $3.00/bar.
Wholesale Price x 2 = Retail Price
This is when it gets profitable! So you’re already making money by selling your soaps wholesale, but when you sell retail the profits add up even more.

It is important to know your market and know your competition. Determine what your market will bear. Then take a look at your competitors. What are they missing in their offering, if anything? Is it something you can capitalize on? If you decide to be target the higher end of your market, be ready to defend your prices to your retail and wholesale customers. This can be as simple as educating them on the benefits of your soap or special ingredients or visually convincing (via knock-out packaging) your potential customers that your product is upscale and worth the price difference.

Naming Your Company
Make It Memorable
It’s your brand. And you’re going to live with it day in and day out. You’re going to say it over and over again in person and on the phone. Make sure you really love it.

Is it available? Check out the trademark website to ensure that the company name has not been taken by someone else. Go to the U.S. Patent and Trademark office at www.uspto.gov. Complete a new search to confirm that your name is available. This is crucial in your planning process for two reasons. First, you do not want to be slapped with a Cease and Desist or lawsuit for using someone else’s trademarked company name.

Second, it is a complete waste of marketing money to put time and effort into a name to lose it years down the road.

Once you determine that your business name is available through the U.S. Patent and Trademark office, check to see if the website address has been taken. This can easily be checked through a site such as GoDaddy.com. I recommend sites that end in .com instead of .net or .us.

Your name should reflect your line of products. It should be catchy, memorable and marketable. Your name does not have to include the word “soap”. You can always add “soap” to your tagline or slogan.

Sales Channels
Where Oh Where Will You Sell?
There are several sales channels for selling your soaps. If you are just beginning, start with your family and friends. When I first started I gave away a lot of soaps. I held a spring open house at invited my friends and neighbors over to test my products. I wanted clear and honest feedback on my recipes. Were the soaps moisturizing? Were they long-lasting? Did they like the fragrances? What didn’t they like and what would they recommend?

Retail Sales
Potential retail channels include art and craft shows, farmer’s markets, home parties, and the internet just to name a few.

Corporate and hospital venues can be great exposure for your products. I travelled around the New England area for eight years selling at such locations. At least here in New England there is very little competition selling in this channel. Most businesses and hospitals ask for 20 percent of your daily sales or charge a flat daily fee. I found this to be an effective way to build my brand by educating customers, making sales, networking and referring business over time to web sales.

You must have attractive displays, set prices, business cards or fliers to spread your information, Be ready to educate your customers. Do not assume they know the benefits of using handmade soap.

One of the best tips for successful retail sales where you have the pleasure of meeting your customers one-on-one is to stand and sell with passion. Take sincere interest in your customers and keep your focus on them and their skincare needs. Tell and show them how your products will benefit them.

Offer quantity pricing such as $6 each or four soaps for $20 to increase your sales. Remember to cross-sale with lip balms, scrubs and lotions. Suggestive selling works!

I highly recommend accepting credit cards. At least 20 percent of my retail show sales were credit card sales and most of them averaged $80. There are many reputable credit card processors, just ask other business owners you may know for a personal referral.

Remember to collect sales and use tax for your respective state.

Wholesale
When it comes to wholesaling, I could write a book! There is so much to say, but much of what you will learn will come from experience.

There are a few key points that I do want to touch upon to guide you into successful wholesaling. You must do your homework and be prepared. As a previous store owner, it can be painful to see a new artist enter your store and try to sell you wholesale for the first time without having done their research. Visit your potential wholesale account first and see if you can envision your soap on their shelves. Call ahead and arrange a time to meet with the store buyer. Be gracious and understand that oftentimes these store owners work long, hard hours and deal with many people on a daily basis trying to sell them something. Don’t drop in on a store owner unannounced and expect them to meet with you.

Understand wholesale pricing and terms. Then design and print out copies to hand out to potentially interested parties. Information on wholesaling should include minimum opening order (the minimum amount a retailer must spend to write an order with you). Currently my minimum is $300. For me, this immediately weeds out serious buyers. Also, consider that you’ll want retailers to carry a good selection of your products otherwise they will become “lost” in the store. For me, a $300 minimum assures the store owner that my line will have a strong and visible presence and will have a better chance of being sold. If you sell a store a few bars they will linger in the store and then the owner may turn around and tell you that they never sold. And perhaps they didn’t sell, but it was due to low visibility. Good retailers understand this concept. Set your wholesale opening order for at least $100
.
Your wholesale sell sheet should include some quality pictures of your products, with wholesale pricing next to each one. Remember, wholesale is half of the retail price. If you are selling your retail soaps at $6, then you will be wholesaling them for $3.

Each of your products should also have a minimum. Most companies sell in dozens. This is a good idea for several reasons. What you don’t want is stores ordering two lemongrass soaps, three lavender, and so on. This is a time killer and you’ll be spinning your wheels for the desperate act of selling a few bars. Raise your minimums and you’ll raise your bottom line!

In regards to consignment (placing your soaps in a store under contract and being paid as they sell) I do not recommend it. There is low incentive for store owners to sell consignment products (they haven’t paid for them upfront as they do in wholesale) and in my experience it often results in low sales, as well as over-handled and damaged products. I my earlier years I attempted consigning, but it was never worth the hassle to me.

Writing Your Business Plan
Put Your Ideas on Paper. Get It Out of Your Head. It Doesn’t Have to Be Perfect.
Detailed strategic planning is essential to a successful business. This is often challenging for creative entrepreneurs. I know that it is for me. If it helps, find a mentor. This can be through the Small Business Association, or a successful business owner who is willing to take you under their wings to meet on a monthly basis for feedback and guidance.

It may help you to take a business plan writing class. This is what I did and I found it very helpful. Most classes give you deadlines in various stages throughout the planning and writing process. This enables you to get your business plan finished in segments. You’ll want to pay close attention to your business market analysis, competitive analysis and strategy in particular.

Once you’ve completed your plan, review it every three months and see if your business needs to be redirected in any way.

The Legal Grunt Work
Business Insurance, City and State Business License, Trademarking
Business product liability insurance is a must if you are selling your soaps. Check out insurance offered through HSMG www.hsmg.org and Indie Beauty www.indiebeauty.com (see Resources below).
Each city and state requirements are different. Check with your local town office for business license requirements. They will have information or be able to point you in the right direction to acquire your state business license.

As mentioned under establishing your business name, you’ll want to confirm that the trademark for your company is available, and purchase it immediately. I’ve heard many stories of business owners who “saved” money by putting off buying a $325 trademark, investing thousands in marketing and sales of their business name, only to turn around a few years later and spend thousands of dollars in a lawsuit to save their name from someone trying to purchase the trademark.

Lastly, open a business checking account. Keep your income and expenses separate from personal spending. Use Quickbooks weekly to see where you are with income.

Setting Up Shop: Studio/Work Space vs. Renting
Creating Your Own Workspace. Basement, Studio or Spare Room?
Keep your overhead low and don’t rent if you can avoid it — at least not initially. I worked out of my home for several years before an opportunity to open a retail store presented itself to me. Working from outside your home has its advantages and disadvantages. For advantages, it’s wonderful to get the clutter, paperwork, etc. out of the house. When you close the door to your store, you can call it a day. A disadvantage to a retail store, besides the overhead, is that it requires your constant attention from 9 to 5. Ask yourself if you are in love with the idea of owning a store or if the day-in, day-out demands are something you really want to do.

Working from a home studio as its advantages and disadvantages too. If you have children, working at home is a great way to have a flexible lifestyle. I can take an hour or two break in the middle of the day to see my daughter’s soccer game, then make up those two hours at night or the next day. This won’t be the case if you have a retail store and are your company’s only employee. I liken a retail store to having another small child: someone always has to be tending to it. Working from home also gives you the advantage of taking home writeoffs such as home office and other partial deductions including heat, electricity, home repairs and such. Talk with your accountant for more tax information.

Wherever you set up shop, you’ll need plenty of table space, a large sink, shelves or baker’s racks and soap making equipment. A used restaurant supply store can be a gold mine when it comes to finding baker’s racks and stainless steel tables. The racks are a great place to let your cold process soaps cure, or to simply store your glycerin soaps. They free up your table space (which I find I can never have too much!).

One of my favorite pieces of soap equipment is a double jacketed wax melter that holds 200 lbs. of melt and pour base. If you are looking at making large quantities of melt and pour soap, this is the way to go. I make cold process soap in 15 lb. batches, and a deep stainless steel pot that you can find at a discount store works fine.

As you increase the size of your batches, consider some of the equipment sold at www.soapequipment.com or www.candlewic.com.

Labelling and the FDA
What You Need to Know
There are two ways to label your soaps: you can create your own or have someone create them for you. I have been printing my own labels for 12 years. My customers comment that they like the handmade look. It’s easy for me to make changes and there is very little up-front investment. Many label companies require runs of 500 and up per SKU (stockkeeping unit) or fragrance.

A reliable resource for labels is Worldlabel (www.worldlabel.com). I use standard white recycled address labels for the front and back of my bar soaps. There are many other varieties available for inkjet and laser printers in kraft, clear, waterproof, pastels and more (found here: http://www.worldlabel.com/Pages/wl-ol875.htm). There are many more sizes besides the address label ones that I use including full sheet labels, circles, ovals, rectangles and more.

When labeling, it is essential to employ FDA label requirements. Legally you must list the quantity of contents, in terms of weight. An identity statement indicating the nature and use of the product, a common name, an illustration or a descriptive name must be used. It is important not to make any medical or promising claims on your labels.


The following information must appear on an information label: name and place of business (or “manufactured for…”, warning and caution statements if necessary, and ingredients.)

Marketing & Sales
Just as Important as Making Soap
Your marketing and sales initiatives rank just as high as your soapmaking efforts. They work hand-in-hand. Successful marketing and sales results allow you to make more soap and around and around it goes.
Business cards are a must and can be custom designed rather inexpensively at www.printmadeeasy.com This is my favorite place for printing promotional postcards as well as business cards.

If your website launch is a few months or years away, at least grab an account on Twitter under your business name as well as a Facebook fan page and a blog. Go to your local library and find a book on internet marketing or hire someone to do it for you if it fits in your budget.

A good website with a shopping cart and credit card processing will run you anywhere from $1200-3000. If you’re going to do it, do it right and hire a professional marketer that is will give you honest feedback and great designs. Try a site like www.guru.com or www.99designs.com to find a reasonably priced web designer.

Read up on the importance of keywords and Search Engine Optimization (SEO) and see if they will do this as part of your web design. It is crucial to getting traffic to your site. Remember, just because you launch a website doesn’t mean that people are going to find it online.

Attend local business networking events. You never know who you are going to meet. Networking is about being friendly and promoting your business simultaneously and genuinely. It’s no fun meeting someone who is “all business.”

Another way to network is with other soapmakers. I’ve made a lot of new friends through industry associations. In addition to the new friendships, I’ve received a lot of referral business from colleagues who pass along a customer who is looking for a product that I carry. Check out www.indiebeauty.com and www.hsmg.org for support and networking.

Lastly, create a customer list. Keep them updated on your company news, events, specials, and more through an email marketing campaign such as www.mailchimp.com or www.constantcontact.com

Conclusion
Go Ahead, Take Your First Step.
As fun as it is to make soaps, building a business takes research and calculated planning. You can launch a business with as little as a few hundred dollars. It is important to find your niche — you must sell more than just a bar of soap.

Set your prices accordingly. Don’t be the cheapest soap in town.Remember to avoid impulsive spending online. Only buy what you need and in small quantities initially.

Then get a few craft fairs or home shows under your belt and test market your niche to your target customers.

Don’t undersell yourself — there is a perceived higher quality for higher priced goods.
Ask yourself how distinctive your products are to your customers. And frequently put yourself in your customers shoes. Would you buy your own products if someone else were selling them? How do your customers tell the difference between you and your competition? Promote the benefits of your products.

Set weekly, monthly and annual income and sales goals.

There are many other details to setting up a soap making business, but this is a a good start. My hope is that I answered some of your questions and gave you guidelines and confidence to get your business started.

Originally Posted By:  http://blog.worldlabel.com/2010/how-to-start-your-own-soap-business.html


,,
7 Ways to Make Your DIY Gifts More Beautiful

DIY Gifts 
Originally posted on http://www.diynatural.com/diy-gifts-more-beautiful/

7 Ways to Make Your DIY Gifts More Beautiful

Over the years, friends and family have come to expect DIY gifts from me like lip balm, soap and even laundry detergent. Making gifts for holidays, birthdays and other special occasions not only saves me money, but it also allows me to exercise my creative muscle and spread the word that a natural DIY lifestyle really is simple.

However, while I’ve loved making natural gifts to give my loved ones, I haven’t so much enjoyed the packaging part. Traditional wrapping paper didn’t seem quite fitting for something I’d made myself and I wasn’t quite sure what else to do.

Thankfully, I’ve had a lot of practice over the years, and thanks to many websites, especially Pinterest, I’ve learned some tricks that have helped me beautify my DIY gifts.

1. Tags

For gifts that you want to include ingredients and/or recipes, use a gift tag made with card stock or a label, depending on what you’re giving the gift in. You can find plain pre-made gift tags or you can make them yourself. (Especially if you have a Cricut, which easily cuts them out for you.)
If you prefer to stick a label on the gift you’ve made, you can also find fancy labels in all sizes, like circular kraft labels that look very “natural” or even chalkboard labels that you can write on with chalk.

2. Jars and Bottles

I’m 
obsessed with quite fond of glass jars and bottles. They have so many uses, including packaging for DIY gifts. There are many edible gifts in jars you can give, but you can also use them for things like laundry detergentherbal bath salts and homemade lotion.
Bottles are naturally great for all things liquid, be it homemade dish soapflavored kombucha or homemade vanilla extract. You can wrap them or present them as is.
DIY Gifts 1

3. Bags

If parting with your jars and bottles is difficult (I understand), try using bags instead.
Brown paper coffee bags (like these) are perfect for things like mulling spices, bath salts, loose leaf teas (like the sleepy tea found here) and even laundry detergent. You just need to print off a custom label with ingredients and directions and stick it on the front of the bag.
Fabric bags are also great for the same thing. You could make or buy muslin, cotton or burlap bags in many sizes to package your DIY gifts.

4. Wrapping

Traditional wrapping paper can be expensive and wasteful. And in my house, way too easy for little kids to rip through prematurely (no matter whose gift it is).
Instead, I prefer wrapping presents in fabric or packaging paper and tying on some jute twine or ribbon and a gift tag. If I use fabric, it’s usually with something that I put in the middle of a scrap of fabric and then pull all four sides up around it. I then secure it with the twine or ribbon.
With the packaging paper, I use it as I would normal wrapping paper. I’ll either leave it plain brown, or let the kids decorate it with stamps or drawings.

5. Stamps

You can make a gift look extra special with just a stamp and some heavy-duty paper or a fabric bag of some kind.
If you want to give some soothing bath herbs, for instance, try packaging them in a muslin bag or brown paper coffee bag. Use a stamp and ink to personalize whichever option you choose (make sure you get the right ink for the project, of course).
You can also personalize your gift tags, wrapping paper and homemade stationery with stamps.

6. Molds

Certain gifts, like homemade bar soap or chocolate lotion bars, need to be poured into some sort of mold. Typically, I use a silicone muffin tray or the rectangular soap mold my husband made me. However, if I know the batch I’m making will be mostly gifts, I’ll change it up a bit with a special mold.
There are lots of fun molds available, including geometric shapes, floral molds and even animal molds.

7. Scents

One of my favorite tricks I’ve learned is to scent Christmas (or other special occasion) cards with essential oils.
Put your cards in a sealable bag or container. On a cotton ball or wadded up piece of cotton fabric, apply 2-3 drops of cinnamon essential oil (or any other oil you love). Place the cotton in the bag with the cards, seal it, and wait 24 hours. Your cards will smell amazing. (Find 100% pure essential oils here.)
This idea isn’t limited to stationery. I’ve made a lot of things “giftable” by adding one or more essential oils for a special scent, including laundry detergent and Epsom salts.

 Originally posted on http://www.diynatural.com/diy-gifts-more-beautiful/ 

..

Monday, December 9, 2013

Starting a Soap Making Business -- 5 Tips For Profits


Starting a soap making business goes far beyond hobby soap making.   


You see there's more to a business than just making product.  Marketing is more of a challenge than making nice soap.  Maybe that's why very few soap makers really make much money.

Too much time is spent on soap making and not enough thought goes into selling it.  My family started a home-scale soap and crafts business and sold 35,000 bars of soap at a profit.  Here are tips based on what we learned.

Make the best soap first...
Don't even think of trying to sell crude, half-cured soap.  That hurts your chances as well as all other handcrafted soap makers.  Only offer for sale products that are of the highest quality.  It takes some practice and study, but that's just the cost of getting started.

No competition???
Soap makers are everywhere.  Handcrafted soap is everywhere.  So what do you have to offer that someone else doesn't?  What can you do with soap to set your product apart, to truly make it unique?  Answer that question and you may really have little competition.  See, it's no longer good enough to offer your soap as better than commercial soap.  Most people have now heard that.  How can you make soap that's better than other soap makers?  That's the key...


Sell 5 ways.
Once you have high quality, unique soap products, how can you move it in volume?  Here are five suggestions that when taken together start to build a marketing system.  1. Find a volume outlet like craft shows or festivals and sell a high volume in a short time.  2. Follow up with customers using simple brochures.  3. Sell through a simple catalog to past customers.  4. Offer volume sales to retail stores or spas.  5. Stay in touch with customers with a simple website.  Put all these together slowly for a real marketing network.

Sell more to customers.
The really easy sales are sales to your existing and past customers.  That's why you must have several methods to stay in contacts with everybody who has already bought from you before.  Do that and you may be able to mostly stay at home and generate an income from home.  Repeat sales are the key.

More than soap.
What else goes with soap?  Lotions, salves, gift baskets, candles, oils, fragrances, and on and on.  You can offer customers much more than just simple soaps.  That's another way to sell more without working a lot harder.
Starting a soap making business is easy to do.  Making profit at it takes some thought and planning.  Get started right and your business can be a serious part-time income fairly quickly..

We suggest that you subscribe to this blog to receive notices of future postings that include Soap Making as well as Soap Marketing ideas.


Original Post by:  http://www.articlesbase.com/home-business-articles/starting-a-soap-making-business-5-tips-for-profits-1151463.html

..

Saturday, November 30, 2013

There's Nothing to Fear from Bar Soap

There's Nothing to Fear from Bar Soap

Many folks believe that liquid soap is best for cleaning the hands and body because bar soap is somehow unsanitary. I've even read that bacteria can grow on soap bars, and that people shouldn't share bars because it can spread disease.
One Bar Shea Honey Oatmeat Handmade Natural Soap  - Unscented for sensitive skins    So I went looking for some evidence that bar soap is this vector of contagion. I found several studies that show that bar soap, especially when left to sit in a puddle of water or in a wet soap dish can harbor colonies of bacteria. It makes sense since bacteria love to hang out in wet places.

But one study in 1988 went a step further and asked the question, "Can the bacteria found on soap get transferred to someone else?" That's really the issue, isn't it? What happens to the bacteria that is living on a bar of soap?  (http://www.ncbi.nlm.nih.gov/pubmed/3402545)

So the researchers took some bars and spread a whole lot of bacteria on them: 70 times more than anyone had ever found on any soap bars before! Then they asked the volunteers (brave volunteers) to wash their hands with the soap. When they tested their hands for bacterial contamination, there was no detectable bacteria on any of their hands. So they reason that it's very unlikely that germs that are present on soap bars will be transferred to someone using the soap to wash their hands. It makes sense to me, since that's one of the great things about soap, that it dislodges bacteria and makes it much easier to just rinse it away.

I don't make liquid soap, by the way, because I believe that handmade bar soap is better overall for the environment. It doesn't contain any detergents or petrochemicals that can get into our waterways. And there is much less packaging involved with a bar of soap: some shrink wrap (like mine) or maybe a paper wrapper or box. While plastic pump bottles may be recyclable, I still like the idea of trying to make less of the plastic stuff to begin with.

And you can't beat handmade soap bars for variety! You could never get bored with all the scents and colors and designs...

So fear not! Use your bar soap, keep it in a draining soap dish to let it dry out between uses, and enjoy!

Originally posted by Sirona Springs - http://us1.campaign-archive2.com/?u=059ae8bfa060f8fea26f7070a&id=18e732a318